31 July 2013

Lamb-tastic Purse

After work today, I finally got around to trying out the Bouquet purse pattern I had been drooling over. It claims to be a "Two-Hour Tulip Purse" but it took me three hours to finish it. That is probably because I had to run to JoAnn's for a magnetic snap closure and make dinner.

Out of the four possible sizes, I opted to make the standard size which is supposed to be melon sized. I used texty fabric for the inside. If you can see it, that is an x-seam. I CONQUERED AN X-SEAM! Forget the Y-seam, it's an X! Okay, maybe I'm a little too excited about this. :)

The sides are supposed to be folded in so the bag looks like a tulip, but I can't get them to stay tucked in. Anyone have any suggestions? Also, I opted for a magnetic closure instead of chord around a button.

And finally here is the finished purse!

I purchased the main fabric while on vacation in Colorado last year because the lambs were too adorable. This way they are showcased in something I will carry around everywhere with me. The lambs and I are going scuba diving this weekend, so there will not be much sewing going on in my world this weekend.

30 July 2013

Modernista Homemade Swap

This was my first time to take part in the Modernista Homemade Swap and I was very nervous. You have to make a large and small object. I did a mini-quilt and scrap basket.

I really can't say anything about my partner because she hasn't received the package yet and might read this. That being said, based on the tracking number, she should have so that is stressing me out a little bit (What if I wrote the address wrong? What if someone stole it? What it it was destroyed in transit?).

Anyways, I will go into detail about why I made what I made later. For now: Just photos! This first one shows the exterior panel for the scrap basket.

This second photo shows the quilting I did on the scrap basket. I stitched in the ditch along the strips and added quarter inch lines along what would become the bottom of the basket. In my mind, this would make it stand a little sturdier.

And here is the finished scrap basket!

For the mini-quilt, I was able to add some FMQ that I was proud enough of to not rip out! Score!

This is the mini-quilt in all its flutterby glory. Really though, why are butterflies not called flutterbys? They flutter by! C'mon! That kept me up at night when I was a kiddo.

23 July 2013

Quilts & Bags, Quilts & Bags.

I finally finished the front of the puppy dog sample quilt I have been making. It required 25 of these puppies and my goal was to make sure all of the points on the ears stayed in tact! Also, it only takes one 5" charm square per puppy, so it could be make to look scrappy!

I love all of the puppies together. What I love most about this pattern is that the rows are staggered so there was no need to make sure everything lined up. Score one for my lazy side.

Here is what it looks like with all the rows and borders in place. I would like it to be known that my goal of not losing a single point was met! Yesss! I apologize for the front porch picture (you have to admire my photo-bomb succulent!) but it was way too sunny to get a picture anywhere else.

In case you are wondering, the puppy pattern is actually called Nicole. I found it in this book:

 I also got the Science Fair quilt in Honey, Honey back from the quilters. I finished the binding up last night.

I used an Amy Butler print for the backing. This one is also destined to be a sample quilt.

I also made a couple of grocery bags. This first one is for my boyfriend. The main panel is an old t-shirt of his. It was one of his favorites, but he hated the color and was going to give it away since he never wore it. So I asked if he wanted me to make a bag out of it so he could keep the design, and he went for it! Mad props to anyone who gets it!

Here is a close-up of the front. It looked too boring without the little bit of hand stitching. Hopefully he will like the addition. :) [Edit: I gave it to him this afternoon and he thought the hand stitching was a great addition.]

This is what I used for the lining. Too bad there is no Firefly fabric.

I also made a bag for my cousin. She is obsessed with ornamental cabbages, so when I found this fabric, I absolutely HAD to get it. She suggested the mushroom fabric for the straps. Here is a picture of both the front and back, since the cabbage fabric is so different on either side.

12 July 2013

XMas in July: Part 2

I love the whole line of Aspen Frost fabric since it doesn't look overwhelmingly festive. There has been much hemming and hawing about what to make out of it. Since I was making a sample quilt for my LQS, the owner and I had to work together for a plan. We finally came up with something out of this book:

The pattern I used is called Juniper and it was very fun and easy to make. If you ever make anything out of this book make sure you use starch!! Every single piece of this quilt was cut on the bias, which means there was a lot of seam ripping. Here is the final quilt.

I just love the little trees along the short edges! The triangle/wedge ruler that the book utilizes seems like it will be very handy for lots of projects in the future. Spweee!

For the binding, I used this candy cane stripey fabric, which was perfect for binding because it looks like it was cut on the bias! My lazy side was ridiculously excited about this.

Here is a photo of the backing and faux-bias binding. The quilting was done by Kenneth Butler.

I have no idea what to do with this quilt when it comes back from being on display at the Quilt Cottage. Oh well. I'm sure it will find a good home!

09 July 2013

Quilt, Bag, Meal [+Recipe]

If this post seems random, blame the three cups of coffee I had today. Both my body and brain are twitchy. I never consume caffeine so three cups in one day is nuts.

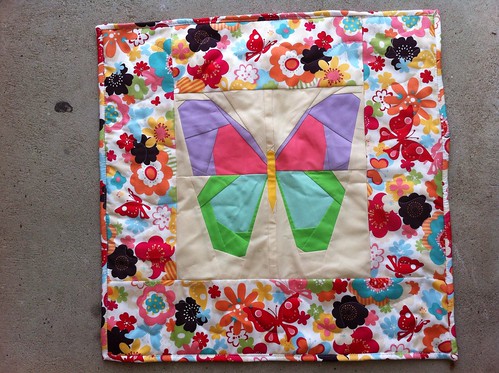
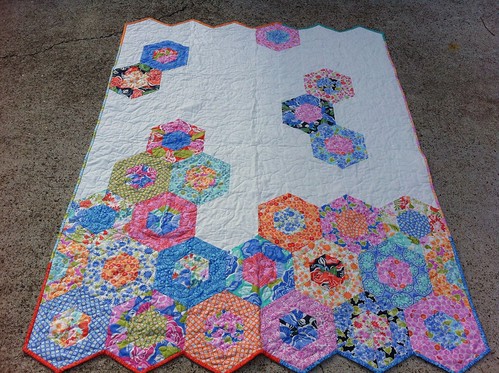
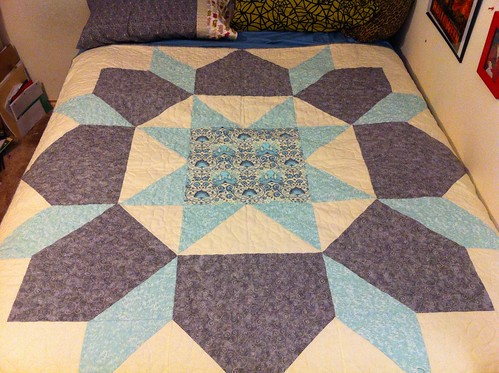
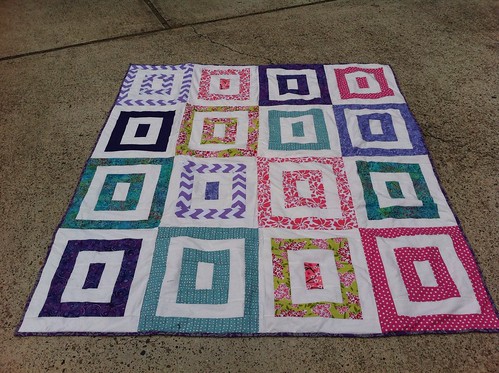
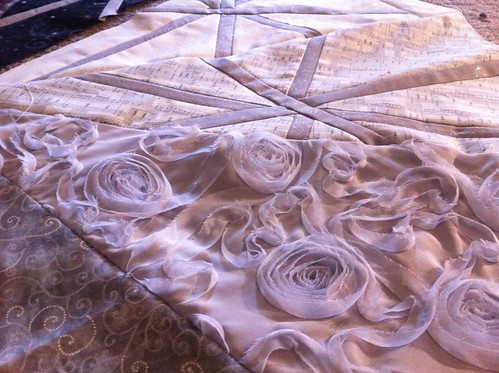
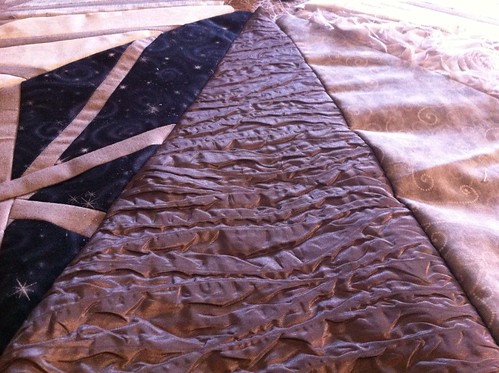
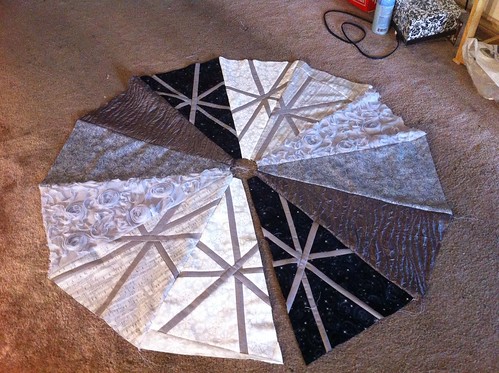
I finally made a quilt for myself, and actually completed it! I splurged and had it professionally quilted knowing that I would see all the flaws if I quilted it myself. This way, I will never see them. Woot! Super Swoon! I am loving the focal fabric!!

And here it is: Finished and spectacular! Ps, I have already napped under it! Since I live in south Texas and we are having heat indices of 106+, I had to really crank up the a/c for said nap. It is 64" x 64" and I am short enough that it works as a quilt, but if I get too snuggly, my toes stick out the end.

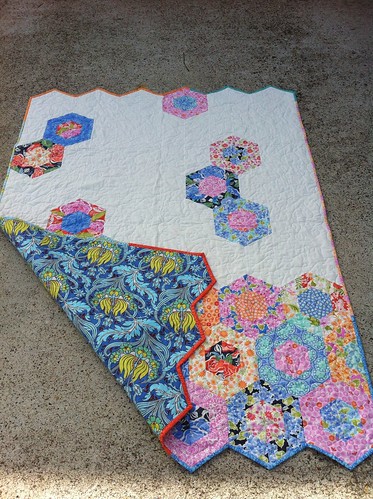
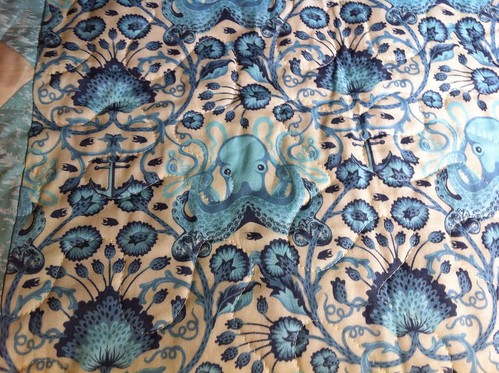
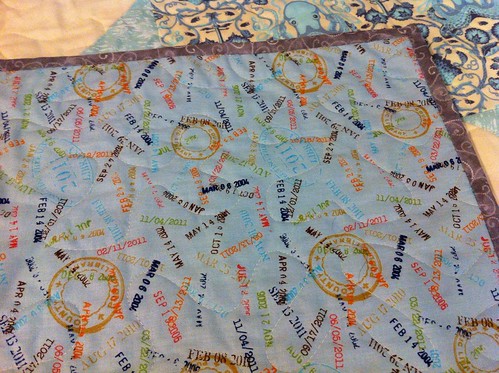
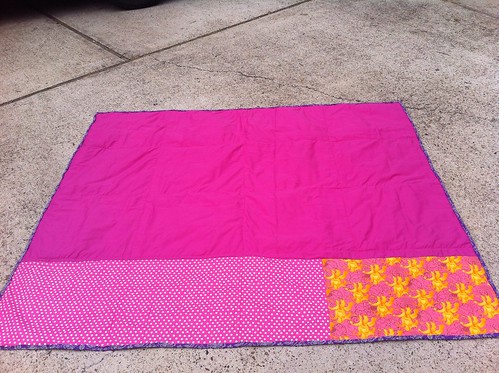
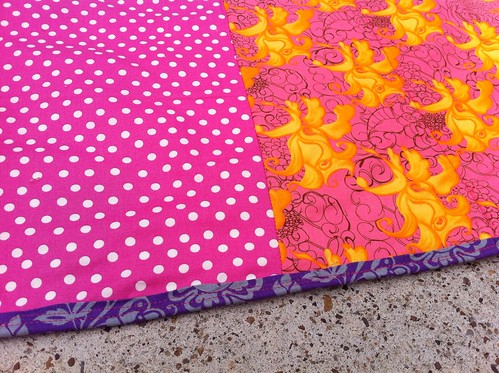
Here is the fabric I used for the back. It is from Connecting Threads.

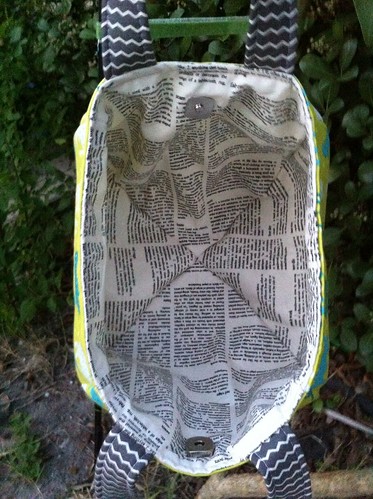
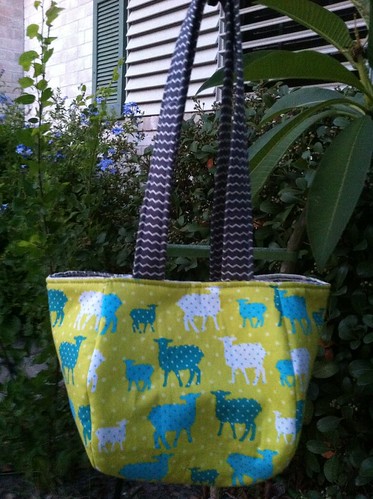
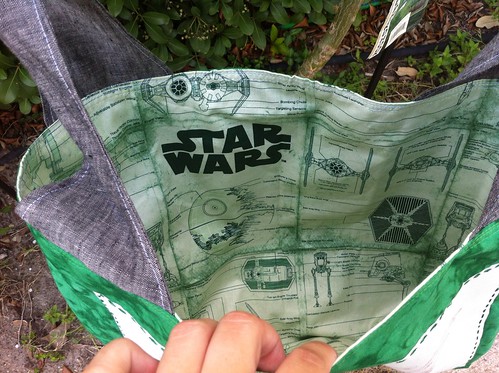
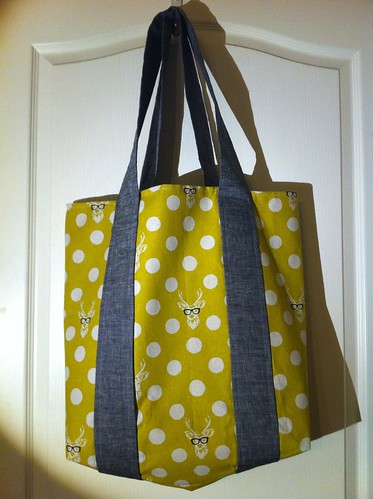
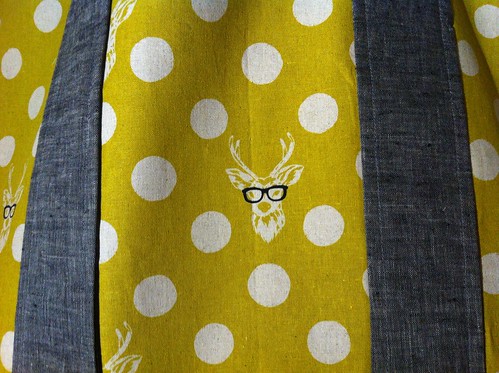
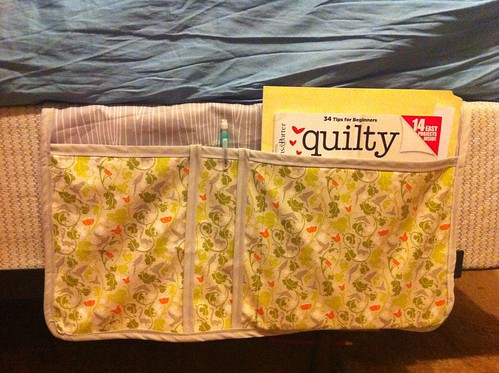
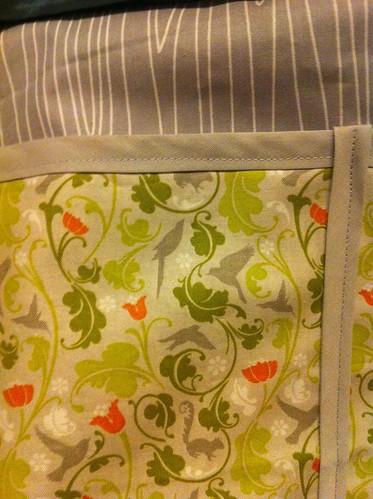
I also tried a new bag pattern: The One Piece Bag by Fig Tree & Co. It was pretty easy, but mine isn't even close to perfect. It doesn't look too bad, though. :)

This was my first time to successfully install a magnetic closure!! I'm spweeeeing with pride!

I also worked on cleaning out my fridge. You know how that goes: "Hmm, this is about to go bad. What can I make out of it?" I ended up with Brussels sprouts, one potato, an onion, and eggs. Well, I always have eggs since I have chickens, but still. I decided these things could be put to use as a hash.

Side note: I'm on a quest to find a way to prepare Brussels sprouts so that everyone who hates them will like at least one recipe.

While working on the hash, I decided poached eggs would be a wonderful addition to this dinner for breakfast concoction. Then it dawned on me... I don't know how to poach eggs! That could have been problematic. Not to fear! I watched a Martha Steward tutorial and built up the confidence to try.

Sadly the first one came out disastrous. It would soon become dog food. Really though, it wasn't too bad considering it was the first egg I had ever poached.

I decided to give myself one more try before giving up since I have two spoiled dogs and they wouldn't want to share an egg.

If this one failed, I would switch to a different type of egg preparation and have two happy puppies. These are my puppies: Bear & Fritz. Bear is the rat terrier mix and Fritz is the wirehair dachshund terrier mix.

 Miraculously, it turned out okay! Mmm, the yolks from my backyard chickens look so dark orange.

Then it occurred to me that the first egg I used came from Hyacinth. She lays light brown eggs. This is Hyacinth. She is a Barred Plymouth Rock.

The second egg I used (the one that turned out!) was a blue egg. Violet is the little lady who lays the blue eggs. This is Violet, an Ameraucana.

Not wanting to leave anything to chance, I used another Violet egg for the third poached egg attempt. No, I do not usually sort eggs by chicken, but it looked prettier for the picture this way. 

Poor little Rose. She lays the dark brown eggs that were neglected in this endeavor [and almost in this blog post!]. This is Rose, my Rhode Island Red.

Surprisingly, the third try at poaching an egg turned out just as well as the second (my poor dogs were forced to share an egg. The horror!). Also, this is what the hash turned out like. What a delicious breakfast for dinner meal! Mmm.

The hash was super easy. Here is a basic recipe. I made it up as I went, so you should experiment as this is merely a guideline. Add different veggies or spices. Go crazy and have fun with it!

Brussels Sprout Hash Recipe

Ingredients
  • one potato, grated
  • 7-10ish Brussels sprouts, chopped
  • Half an onion, chopped
  • A few cloves of garlic (# depends on your love of garlic), minced
  • 1 Tbsp. olive oil
  • Salt & pepper to taste
Directions
  1. Heat olive oil in pan. 
  2. Add potatoes, Brussels sprouts, onion, & garlic to pan.
  3. Sautee until potatoes are nice and cooked. I think crunchy is the standard for hashes.
  4. Salt and pepper to your taste. 
  5. Serve and enjoy!


04 July 2013

Two Quilts: Done and Done!

Happy Fourth of July! Before I talk about quilts, let me share my holiday plans: My boyfriend and I are celebrating by brewing beer and making cheese. Yess! The feta is already draining, and the brewing will begin as soon as I finish this. [Must hurry!!] Here is the wad of feta draining in cheesecloth.

I finally finished two quilts that had been put on a back burner. They are a baby quilt and big sister quilt for the two kiddos of my friends, Jeff and Sonya. I had both of the tops finished a good while back, but was held up on the quilting because I couldn't find true white batting that I was happy with for the girl quilt. I could have used cream, but there is just so much white and it seemed better this way. I finally found some. Then I ran out of spray basting and no one in town stocked the kind I like. That was a huge ordeal.

But this week I found myself with everything needed to finish the quilts. So I finished them! Let's start with Ray's baby quilt. It is just a whole bunch of HSTs used to make a chevron/leaf sort of pattern. I usually try to make baby quilts bigger than normal baby quilts so they can be used for longer. This one is 49 by 56 inches. I love the way it came out. The picture doesn't show it, but those are not solids. I showed the fabric closer way back in this post.


I normally don't show off the backs of quilts, but I'm proud of these because the fabric for the backs came from my stash! I'm really trying to use up a lot of that. The colors look really off in this picture, because that incredibly dark stripe is actually a chocolatey brown, not black. Feel free to use your imagination.

Next we move on to Reese's (Theresa's) big sister quilt. I decided to make her a big sister quilt since she has been an only child for 5 years until Ray came along, and is doing a wonderful job of adjusting. Plus, I didn't know them when she was born, so she never got a baby quilt. Only my boyfriend and cousin (who introduced me to the happy family years ago) knew about this one! I used the Apple Crate pattern from Moda Bakeshop for this one, but used fewer block to made it smaller. The finished size is 56 by 64 inches.


Here is a photo of the back of her quilt. All of the fabric came out of my stash!

Since her favorite colors are pink and purple, I decided to use purple for the binding. Oh! Oh! The fabric for the binding for both of these quilts also came out of my stash! Woo! Stash busting!

Mmm, the colors in these two quilts really compliment each other. I just love the way they look all folded and stacked together.

I dropped off the quilts this morning. Baby Ray was asleep, but Sonya seems to think he will like it.  Reese loved her quilt and was already using it as a tent.

Am I the only one who makes quilts with the hope that they will be used as tents and blanket forts? I think the biggest compliment on a quilt is when you go to someone's house and the quilt that you gave them is showing signs of wear. I don't make quilts to sit unused and in perfect condition; I make them to get used!

Anyways, it is time for me to stop typing and to start brewing. In case you are wondering, we are making a clone of Jester King's Farmhouse Black Metal Imperial Stout. Here is a picture of the grain that was just added to the water to boil [in technical terms, this is call a mash].

I made the voile bag that the grain is in and it has held up through 3 batches of beer brewing, so far. If you are interested, I wrote about the bag itself over here.

EDIT: Just for funsies, I am going to include a picture of the beer, now that it is brewed and ready to ferment. In about two weeks, it will be ready to drink! Spweee!

03 July 2013

XMas in July Part 1 + Misc. Projects

Last Christmas before my boyfriend and I jetted off (sailed off?) on a holiday cruise to avoid holidays, we spent some time at his sister's house. She was setting up her tree. Her living room is huuge and has incredible vaulted ceilings which means the space demands a big tree.

As I was helping her hang ornaments, it dawned on me that she didn't have a tree skirt. Naturally I asked her why this was. Apparently she just couldn't find anything that wasn't disgustingly cheesy and Christmasy. So I decided to make her one.

For her tree skirt, she wanted black, silver, and white. (Yay! Oxford comma!)

I have spent a few months researching patterns and came up with my own. I am using twelve 30ish degree wedges. As far as fabric goes, it isn't all quilting cotton! A lot of it is, but I am also including some fancy schmancy fabrics to add texture.

This first one is a "special occasion" fabric with fancy roses.

The next fancy fabric is a crinkly silver. The texture reminds me of ruminant molars. Whatever this stuff is made of made a hilarious popping noise every single time my sewing machine needle went through it.

The rest of the wedges used quilting cotton. Except for one fabric, all of the quilting cotton wedges have a wonky asterisk pattern that could be bows or snowflakes.

So this is what it looks like with all the wedges assembled and stitched together.

Now I'm stuck because I don't know how to quilt it or even what to back it with. Luckily I have about 5 months to figure it out!

On to other projects!

I made my first Spice Market tote. Well, sort of. It was coming out way too heavy with all the interfacing, so I left the interfacing off the lining. This could possible be because the exterior fabric is Echino linen. Have any of you made one with all quilting weight and experienced something similar? I also left out the pocket and the false bottom because they seemed unnecessary for a grocery tote.

Now here is a close-up of the hipster stag linen I used for the bag! Spweee!

I also tackled a project out of One Yard Wonders: The bed organizer thingamajig! I had purchased the rubber shelf liner at Container Store ages ago, so I was itching to make this. I used two different fabrics for added cute. Here are some photos of it. The lighting is horrible because the pictures were taken at night time.