23 September 2014

Broccoli Cheese Soup Recipe

I love broccoli cheese soup! Luckily it is so simple to make. I like to joke that it is easier to make broccoli cheese soup from scratch than it is to fight an electric can opener in order to open a can of it.

Ingredients
  • 1/2 cup (1 stick) butter
  • 1-2 onions, diced (I usually use 1 but accidentally bought 2 once and it was extra tasty!)
  • 4-6 cloves of garlic, minced (you can use more if you love garlic or if your city is plagued with mosquitos)
  • 1/3 cup all-purpose flour
  • 2 cups of milk
  • 2 cups of broth (veggie, chicken, or beef)
  • 2 cups half-and-half
  • 1/4 tsp. nutmeg
  • 4 heads of broccoli, chopped
  • salt and pepper
  • 3 cups grated, extra-sharp cheddar
Directions

Peel and mince your garlic.

Also dice up your onions. I have swim goggles that I wear when chopping onions. They work really well! No more tears!

Wash your broccoli heads.

Chop those up, as well. I like bigger pieces of broccoli and I also use a majority of the stems (just not the big central stalk).

Now we are done with prep-work and can start cooking! Melt the butter in a large pot over medium heat. Add the onions and garlic to this. Cook until they are starting to brown just a tad (3-4 minutes), and add the flour. It will thicken quickly! So quickly that I couldn't stir and get a picture. *sigh*

Stir that for about a minute, and then add your milk, broth, and half-and-half. I used beef broth. More specifically, I used 2 cups of water and one of the gelatinous broth blobs that Knorr makes.

Once it is all mixed up, add in your nutmeg and keep mixing.

Then add in the broccoli, salt, and pepper. I always hate recipes that don't tell you how much salt and pepper to use, but I was getting sick when I made this, so my amounts were probably insane. When in doubt, use too little, and add more to each serving individually.

Reduce heat to low, cover, and simmer, stirring the soup up every 5 minutes or so.

Once the broccoli is tender, which can take 20-30 minutes, remove the soup from the heat and add in the grated cheddar and mix until it all melts in.

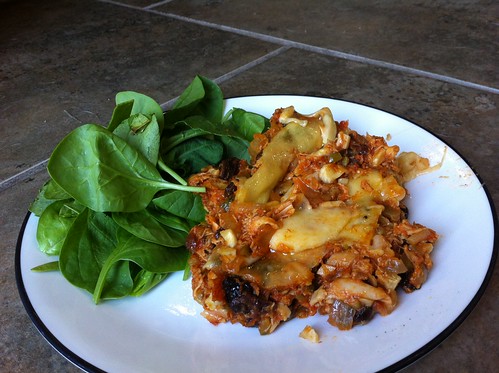
Then you have lots of options. You can serve the soup in bowls...

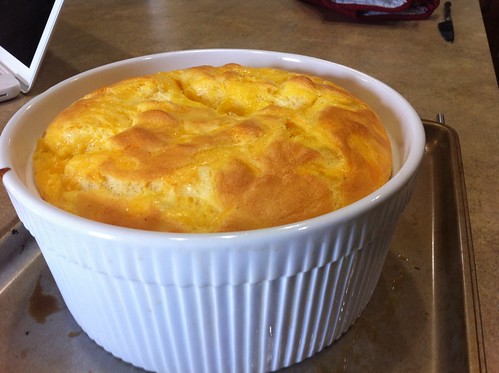
Or you could whip up some bread bowls and serve the soup in that. Recipe for bread bowls can be found over here.

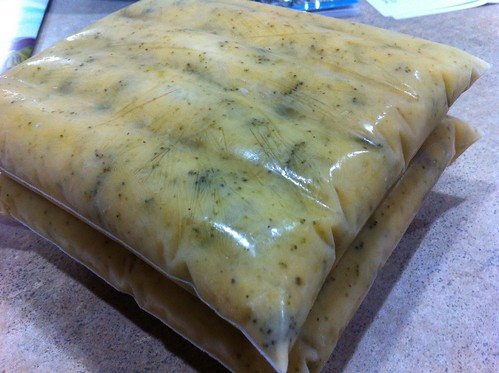
Or you can freeze it up for later. It microwaves well, so putting leftovers in the refrigerator also works well. 
Frozen broccoli cheese soup

18 September 2014

Dulce de Leche Cupcakes

These cupcakes without the caramel stuffing are tasty; with caramel stuffing, they are ridiculously tasty! They are dense, which is especially important if you plan on stuffing them because they are easy to cut.

Picture-less recipe is at the bottom of this post. 

Before you start the cupcakes, you need to leave 8 hours to make the easy peasy dulce de leche. To do this, take a can of sweetened condensed milk and remove all labels. Throw it in a crock pot on low for 8 hours. After it cools, you have dulce de leche or easy peasy, gooey caramel!

Then we start on the cupcakes. It might seem tedious, but this recipe uses two bowls. In the first, add the flour, salt, baking powder, and baking soda. Mix this up.

In the second bowl, combine the sugar and eggs.

Mix these together.

Keep mixing until they are kind of frothy.

Add the vanilla.

Then add the butter and mix again.

Then add this wet mixture to your dry mixture and mix. Mix. Mix. Mix.

Then you add some sour cream. Can you guess what you do next? MIX!

Then you scoop your batter into wrapper lined cupcake pans.

Bake 10 minutes, then rotate the pans. This is what they look like after 10 minutes.

Then bake them for 10 more minutes and they should be done and will look like this.

Mmm! Beautiful cupcakes!

If you plan on stuffing them, cut about a 1" hole out of the middle.

Then fill the cavities with gooey caramel goodness.

While you are at it, add some caramel to your frosting!

Then frost. I use a single recipe of frosting for a double batch of cupcakes because I do not like a lot of frosting.

Then enjoy your cupcakes!

If you want the cupcakes to be salted caramel, simply add a dash of coarse salt right before serving. Om nom nom.


Directions

  • Prepare caramel by putting a can of sweetened condensed milk (with labels removed) in a crock pot on low for 8 hours.
  • Preheat the oven to 350 degrees. Line pans with cupcake wrappers. Single makes about a baker's dozen, double makes about 29.
  • In bowl one, mix together the flour, baking powder, baking soda, and salt.
  • In bowl two, beat together the sugar and eggs until slightly frothy. This can take up to 2 minutes.
  • Add the vanilla and beat together.
  • Add the butter and beat together.
  • Combine mixtures from bowls one and two with beater.
  • Mix in the sour cream.
  • Fill the cupcake wrappers. 
  • Bake for 10 minutes, then rotate pans. 
  • Bake for another 10 minutes or until cupcakes are golden and a toothpick comes out clean.
  • Once cupcakes are cooled, cut a small circle out of the top. 
  • Divide the caramel between the cupcakes, reserving some for the icing.
  • Prepare icing by beating together softened butter, powdered sugar, and caramel until smooth.
  • Frost the cupcakes.
  • If you want salted caramel cupcakes, sprinkle tops of cupcakes with coarse salt just before serving.
  • Enjoy!

10 September 2014

Brunch & Two Recipes

Last weekend my boyfriend's sister and her boyfriend were in town. We all wanted to get brunch together but couldn't decide on a place. Then it occurred to me that we should cook for them! We bought our new souffle dish while visiting them  and hadn't yet tried it out. Since souffle needs a reason, this seemed like a good one! Last time we made souffle, the dish we had wasn't big enough so we had to also use two smaller ramekins which was a hassle.

But this time we had the perfect vessel for souffle cooking! Look how perfectly it fluffed up and fit in the container! Yess!  We followed Julia Child's cheese souffle recipe.
We finally found the perfect sized bowl for the souffle recipe we love. Yes!

In addition to the cheese souffle, brunch consisted of fresh fruit, lemon poppy seed French toast (made with the challah bread I baked last week), and Brussels sprout hash! It was incredible.
We made brunch: Lemon poppy seed french toast, brussels sprout hash, cheese souffle, and fresh fruit.

Today I'm going to share two of my favorite brunchy recipes, lemon poppy seed French toast and Brussels sprout hash. First up:

Lemon Poppy Seed French Toast.
Ingredients for about 4 servings:
  • 3-4 eggs (depending on size)
  • 1/4 cup + 1 Tbsp milk
  • Anywhere from 2 tsp-1 Tbsp poppy seeds (depending on what you prefer)
  • 1 tsp almond extract
  • 2 Tbsp lemon curd (this is totally optional but I love the taste it adds. If you commit to a jar of it though, you are going to have to make this recipe at least 4 times before it expires. How sad! If you don't want to buy lemon curd, add extra juice and maybe some lemon zest and/or marmalade)
  • 1 Tbsp lemon juice (or juice from one lemon)
  • 6-8 slices thick cut bread (I use challah but anything would work)
  • about 2 Tbsp butter
Mix eggs, milk, poppy seeds, almond extract, and lemon curd in a bowl. Slice up your bread. Mix in lemon juice (I save this for last because once I added it after only the milk was in the bowl and the milk started to curdle). Pour the liquid mixture into some kind of pan or flat baking sheet. Put the bread in the mixture and flip is so that each side is covered. Melt about 1/2 Tbsp in pan over medium heat. Cook french toast until golden brown and flip. Once the second side is golden brown, you're done! If your pan is small, add another 1/2 Tbsp of butter for each batch. 

Brussels Sprout Hash
  • 1/2 package of grated frozen hash brown potatoes
  • 1 package Brussels sprouts, washed, trimmed, and cut in half
  • 1 yellow onion, minced
  • 4 cloves of garlic, minced
  • 1 Tbsp. canola oil or vegetable oil
  • 1 tsp. lemon pepper
  • 2 tsp. dried parsley
  • salt and pepper, to taste (you might not need more pepper if the lemon pepper is enough)
Heat oil in a pan and add onions, garlic, and potatoes. Cook over medium heat, stirring constantly until the potatoes start to turn golden brown, this might take up to about 10 minutes. I use a non-stick ceramic pan so that I can easily scrape up the delicious crunchy bits. Once the potatoes are looking extra delicious, add in the seasonings and Brussels sprouts. Cook for about 5 more minutes so that the Brussels sprouts can get tender, then enjoy! I always serve this with eggs of some sort.


The Bunny Quilt: Front

Luna is a wonderful house bunny. She even helps me in the sewing room. Here she is in my scrap bins picking out fabric for me.
Luna hopped into my scrap bins and started helping me pick fabric.

What she didn't know was that she was picking fabric for a quilt that will be hers. Now I know that making a quilt for my bunny sounds ridiculous but hear me out. We keep her condo in my sewing room and have the bottom lined with a blanket so she can't chew on the carpet. Here is her condo.
Luna's condo

Up until now we have been using fleece blankets, but they are flimsy and she keeps biting holes into them so a sturdier option has to be found. Andrew suggested trying a drop cloth, which seemed to work. So I had the clever idea to make a quilt and back it in drop cloth material and leave it face down (so she won't chew on the pretty fabric). This was the focal block I came up with.
Luna! The focal block for the Luna quilt!

I had been wanting to try reverse applique, so I decided to give it a try.
First try at reverse applique.

This was the little bunny I came up with.
My first try at reverse applique.

I had also wanted to try the strawberry paper pieced pattern from Sew Ichigo, so I made a couple of those.
Strawberry blocks

And Luna loves eating flowers! So I made some of those too. I modified the pattern to make the stems taller and have them growing right out of the ground instead of a pot.
Two tulips for the Luna quilt.

Actually I made three, but forgot to take a picture of the third one on its own.
One flower and reverse applique bunny

And Luna's favorite thing to nibble on has to be greens, so I made her some leaves.
Leaf/stem block for the Luna quilt

So then I set about organizing these blocks into a quilt front, and here it is! Now I just need to work on building up the courage to quilt this with drop cloth material on the back.

09 September 2014

New Swatch? (I need advice!)

In a couple of weeks my Swatch collection might be growing, but I can't seem to decide which one to get (if I get one) and I have to go in there with a plan or else I will panic. If anyone happens to see this and has an opinion on which I should get, it would be most appreciated.

For background information, I have a handful of Swatches and they are all bright and colorful so I'm looking for something a little more tame (which I didn't stick to, as you will see). I have narrowed it down to these.

The Scoprimi

  • Pros: Accent stitching is actual stitching, not printed. Has numbers! Has day/date! Lowest cost.
  • Cons: Most boring of the five.

On the Grill

  • Pros: No band markings that can wear off. Has day/date! Second lowest cost.
  • Cons: No numbers. Almost too tame.

Silver Glam

  • Pros: Dots for numbers! No markings that can wear off. See thru for interest. Mid-range price.
  • Cons: No date. 

Chromatic Water

  • Pros: Can wear scuba diving. Has date (not day). Dots in place of numbers. Blends in while being excitng.
  • Cons: Very tall profile. Rotating bezel and large knob can get caught in hair. Second most expensive.

Chromograph

  • Pros: No markings that will wear away. Has date! Has numbers! Minute and second timers! Blends in while being exciting!
  • Cons: Will the white get dirty? Extra buttons = more failure points. Most expensive.


07 September 2014

Cooking and Sewing

This is Luna, Devourer of Worlds. She is our recently[ish] adopted house bunny. Here she is enjoying some outdoor playtime. She helps me sew.
Luna Bunny enjoying her outdoor time!

She helped me narrow down the layout of my Moda Friendship Sampler Blocks. For info on the blocks themselves, including color codes, look here and here.
Finished front of Moda Friendship Sampler quilt.

I have also been working on my fox for the Secret Fox Swap. I came up with this mug rug/mini quilt thing. Obviously it needs facial features.
Obviously the little fox still needs facial features, but it this too minimalistic for you?

Luna, however, was not impressed with the fox. Here she is illustrating how not-scary the fox is by pretending to sleep. So I made the fox a teensy bit bigger. Gosh, she is so helpful. In all seriousness, isn't she adorable when she sleeps???
Luna Bunny, my faithful sewing assistant is hard at work!

Anyways, this semester I am teaching one less lecture and two less labs than normal so I find myself with more time to sew. I pulled this fabric to get started on a quilt for my old college roommate and her boyfriend who just bought a house!
Fabric pull to go with the layout!

And this is the layout I'm working on. The quilt will be comprised of 8" blocks and the blocks that are colored in are what I'm using to make the quilt. So it will be 8 x 9 blocks. If you can see on the bottom of the page, I sketched each possible block then assigned everything numerical values so I could really randomize the quilt by rolling dice to pick block order. I might write a post to explain what exactly I did because it was a really fun and stress free way to decide on a random layout. I also thought it would look awesome to have the colorful blocks surrounded by a border of monochromatic blocks, but KT wants lots of color, so that would not work this time.
Working on a layout.

In other news, all three of my hens are laying eggs! From left to right: Bullroarer, Eglantine, and Polydontasaurus.
All three chickens are laying eggs.

I used some of their eggs to bake some challah bread that we used to make lemon poppyseed French Toast. Yum!
Challah bread!

Speaking of cooking, last week the boyfriend and I decided to do some themed cooking. The theme we decided on was South American. The first themed dish is keshi yena, an amazing treat from the Dutch Antilles. We first had it in Bonaire and loved it!
Keshi Yena!

The second dish for theme week was feijoada, a Brazilian black bean stew. Omnomnom.
Feijoada, coconut rice, and sauteed kale.