24 January 2013

Roasted Veggies Recipe

I am going to share with you my most prized recipe. I find myself making this probably too often. Wait, it can't be too often because veggies are good for the body. Hmm, then I guess I make this just the right amount. Or not enough? Anyways, I love veggies. Most people don't. Actually, most people I know have never even tried a Brussels sprout. This recipe turns them into Brussels sprout lovers. 

**Warning!** I write my recipes how I think, so hopefully it isn't too scatterbrained. If it is, skip to the bottom for a concise recipe without all the gibber-jabber.

I start by preheating the oven to about 400ish degrees. I use the 'ish' because my oven runs hot, so I actually set it somewhere between 375 and 400. Feel free to experiment and figure out what works with your oven. This recipe is pretty forgiving. 

Next I spray my 11" x 17" baking sheet with olive oil. Sometimes I am lazy and put foil down instead, but I was out of foil and making a special trip to the store to buy something that will help me be lazy doesn't seem worth it when you look at energy expenditure. 

Oh, you will possibly be confused my the squirt bottle of olive oil! Allow me to explain: My dad had polio when he was in high school way back when. This left him with post-polio syndrome later in life. He loved cooking. He loved eating salads. He loved plain olive oil and vinegar salad dressing. He had trouble with screw tops. We put olive oil in a squirt bottle and vinegar in another, and presto, he could douse his own salads. It is also a really handy way of coating things in just a little bit of olive oil instead of drenching them. So needless to say, it caught on in my family, and I still use my squirt bottle of olive oil. 

So, about that pan... Squirting it helps to keep the veggies from sticking. You could use that aerosol cooking spray, but I mix (toss?) the veggies a lot, and I don't want the odd taste on them, so olive oil it is for me. Squirt squirt.

Next I work on the veggies. Today I used carrots, red potatoes, and Brussels sprouts. You can use these, regular potatoes, sweet potatoes, parsnips, fennel, any veggie that is appropriate for roasting. Have fun with it! 

First, kerrerts.

I wash them, and chop both ends off. You can peel them, but that seems like a waste of time to me. (Did I mention I'm lazy?)

Save the bits for your compost bin!

Next you chop them into about 1" pieces. I like to pretend the knife is a rotary cutter and cut multiples at a time. You might not like to live as dangerously as I do, though.

You might end up with slices from the fat end that are too big. 'How big is too big?' you might be asking. Well, we want everything to be roughly the same size so it will cook at the same speed.

So if some are too fat, cut them in half!

Then dump those on the greased pan and move on.

Next up: Po-tay-toes. It might help if you watched this video before hand. Or not.

Actually, it probably will not help. Fact: I dance around the kitchen like the odd little potato people in the video when I cook potatoes.

Oh, yeah, back to taters! You can wash them, unless you like eating dirt, which is cool, but I don't, so I wash them.

Then you have a bunch of shiny red potatoes.

 Start by cutting them in half. Do you see those in the very bottom right corner that are sitting flat? They were cut in quarters because they were too big. 'How big is too big?' you might be asking again. Well, we still want everything to be roughly the same size.

I usually cut all of my red potatoes in quarters just because they sit more nicely in the pan and don't wobble. Not that wobbling has ANY effect on roasting whatsoever. It just makes me happy.

Then you add those to the pile!

Finally we move on to Brussels sprouts. I saved the best for last. This is my favorite veggie. For a while in grad school, I was eating them every single day. In my defense, I was finishing my masters, teaching high school, teaching college astronomy labs, and co-directing The Vagina Monologues, so avoiding decisions and eating the same thing every day was beneficial and a real time saver.

First you need to cut off the stem bit at the bottom.

I also remove the outermost layers, because they tend to be a little wilty. This is what you should roughly be taking off. Save this for your compost bin, too!

Then you cut them in half. 'Why? They are already small!' you might be saying. Well, I do this because they are so dang gorgeous on the inside and I just like looking at it.

Then you end up with a big pile of them all chopped in half. Yum. Try to resist the temptation to eat them all right now.

Then you add them to the pile!

At this point, I bring out my trusty squirt bottle of olive oil again and give them a good coating. This will help your seasoning adhere.

Once you think you have enough on there, (about 1/8 to 1/4 of a cup) give them a good toss so that they are all consistently shiny and ready for seasoning.

Now for seasoning, which is where you really get to have fun! For sure, you need to add salt and pepper. Everything else is negotiable. Today I used: Thyme, garlic powder (you could add fresh minced garlic, or whole cloves too), salt & pepper, onion powder (could add actual onion), lemon pepper (could just squirt lemon juice), basil, and sesame seeds since I have so many from Japan. 

You can also add in rosemary, dill, cinnamon (especially if you put sweet potatoes!), cilantro, whatever really! No idea why I didn't put rosemary since it is growing in my garden right now, but oh well.


So add all of that in, and give them another good toss to ensure even coating.

Spread them out so that they are not doubled up on top of each other. You only want one layer of veggies. Depending on how much you are cooking, this might require two pans.

Then you should put them in the oven for about 20 minutes. You will hear them whistling in the oven as the moisture cooks away. It is kind of adorable. While you are waiting, you can go sew something, or start filling your new ice cube trays if your ice cube maker also just broke. *Sigh*

After 20 minutes, you are going to take them out of the oven (don't turn it off yet, because we are not done!). You could fork test the potatoes, but they are not going to be done. At this point, they usually look a little dry, so I add a little more olive oil and mix them up again. This time, don't use your hand because they are about 400 degrees. Ask me how I know.

I recommend a metal spatula.

Then they go back in the oven for about 10 to 15 minutes. If you are worried about overcooking them, you can turn the oven down a bit, or check them more often. Remember though, when you roast veggies, you want the outer bits to be caramelized and nommy.

So after about 10 more minutes, they should look like this! The potatoes should be fork tender (fork easily stabs through them). 

Then you can use them as the perfect side dish to go with any meaty meal or you can be like me and just eat a giant bowl of them AS a meal. Nom nom nom.

 Thanks for sticking through it and enjoy your tasty new food!

Roasted Veggies
Ingredients:
~3-5 large carrots, washed and chopped to 3/4"-1" chunks
~1 lb red potatoes, washed and chopped into quarters
~1/2 package Brussels sprouts with stems and outer leaves removed, chopped in half
~1/4 cup olive oil (plus more for greasing pan)
~1/2 tsp salt
~1/2 tsp pepper
~1 tsp basil
~1/4 tsp thyme
~1/4 tsp lemon pepper
~1/4 tsp onion powder
~1/4 tsp garlic powder
You can add other spices or change amounts to suit your taste.

Directions:
1) Preheat oven to 400 degrees.
2) Grease pan with olive oil.
3) Add veggies to pan. Toss with olive oil, saving some for later.
4) Sprinkle with salt & pepper, basil, thyme, lemon pepper, garlic powder, onion powder, & sesame seeds. (Can add other spices or remove some of these.)
5) Toss again to coat evenly.
6) Spread in a single layer on pan.
7) Bake for 20 minutes and remove from oven.
8) Add a little bit more olive oil to avoid drying out. Toss again.
9) Put back in oven for 10-15 minutes, then remove from oven.
10) Serve and enjoy!


22 January 2013

WIP--1/22/13

**Warning!!** This post is absolutely random and covers so much random stuff including: quilting, gardening, homebrewing, teaching, mail, etc.

Lately, most of my time has been spent preparing for the upcoming semester that begins tomorrow. I am teaching five classes this semester: four astronomy labs, and one lecture/lab combo science teacher prep class. I have taught the astronomy labs for 3 years now (since I was in grad school teaching as a TA) so those are fairly easy for me to prepare for. The science education class is more difficult. I taught it last semester, but only knew I was teaching it 3 days before the semester started. Yuck. This time, I have much more time to prepare. I give you my completed syllabi (with contact info leaf-ed out)! Woohoo! 


I have also been able to fit in time to work on other things! Things like the amazing and hilarious hamburger potholder pattern. Cheese and patty are done. One bun just needs binding. One bun needs quilting and binding. Tomato, onion, lettuce, and pickles still need to be assembled. Clearly though, progress is being made! Woohoo!


I also had time to whip up a few wonky stars for a bee I'm in. One of our member is sick, so we are putting together a get well soon quilt for her.

Speaking of things that need to get well soon, my Brussels sprouts and broccoli have been infested with cabbage worms. I bought the stuff to treat it, then it started raining (which it NEVER does in South Texas) and I felt that it would be wasted effort to spray treatment in the rain. So when it finally stopped raining, this is what was left. So sad. All 6 plants look the same.
I sprayed the living daylights out of them all, and am hoping for the best. Worst case scenario, I rip them out and re-plant in the spring. No biggie. I also purchased some super fun heirloom seeds for the spring which I am very excited about.

I guess that is the therapeutic thing about gardening is that stuff dies. Sometimes it comes back (though usually not). Either way, you go on and try again or try something else. Eventually, it works out. Or doesn't, and that is okay.

I also finally finished potting everything on my front porch! So pretty!


Oh, yeah, back to crafting! February will be my month in Color Bee Shocked, and I have all of the fabric packing in envelopes and ready to mail. This photo shows the fabric selection.


I also finished up a mini quilt kit and dcided to turn it into a pillow cover to sell on etsy. Available here, if you are interested. This is my first item on etsy, so I am pretty excited about it!! I really am not too fond of the fabric the kit came with (Moda Double Chocolate), but the pattern could easily translate into brighter, more modern fabric.


Ages and ages ago, I started working on a Twister quilt. If you remember from this post, I have a really hard time actually keeping quilts for myself, so it sat. As luck would have it, I believe I have found the perfect home for it! Bam! Incentive to start working on it again.

In case you have never made a twister quilt, you start by making a square patchwork quilt top like this:

Then you cut it up with a magic twister block template, and sew it back together. Once it is sewn back together, you get this incredible thing! Drastic improvement. Now that it has a purpose, I just need to baste, quilt and bind it. But I am going to hold off until they are closer to actually buying a house.


In news unrelated to quilting, I also packed up all of the leftover grain from brewing beer this past weekend. Yum! Well, yum to the beer. The grain is now for chickens. It came to about 12 quart sized bags. Chickens think this stuff is the most incredible thing on the planet. I am taking a bunch of it to my cousin, who will soon have 15 hens, and already has one rooster and a peacock. Luckily, every time beer is brewed, this magically appears in my freezer!

Finally, I am going to leave you with something super awesome! As you may or may not know, I collect postcards. [I also highly recommend Postcrossing if you, your child, your grandchild, or anyone you know would like to collect postcards.]

Anyways, a friend of mine recently went to South Africa for vacation, and I asked her to send me a postcard. Usually when I ask people to send one, they forget, so my expectations are not too high. Then today, the most INCREDIBLE postcard I have ever seen showed up in my mailbox! Ahhh!!! So exciting!!! She even went on a shark dive, which has always been my dream.

So, that is all of the random stuff I have been up to. How about you?

17 January 2013

Resolute

This is not a new year's resolution. This is just something that hit me, and I want to try my best to stick to it.

I am not buying any fabric unless it is necessary for a project I am actually working on.

This means no more online fabric ordering in the middle of the night when I get fabric envy from someone else's projects.

This means no more picking up miscellaneous fabric when I visit new out of town shops on my travels just because it is something I like and can't get at home.

Realistically, this might mean no more visiting new shops.

What saddens me is that it means no more obligatory supporting of small business owners. At least I can sleep easy knowing my money will not be going into big box stores instead.

This means no more "oo, but this is my favorite fabric, so I have to buy it every chance I get!"

This is about clutter and chaos, not money (although hello added bonus). My stash runneth over, and I do not feel bad about that. But I know that I have picked up so much incredible fabric and it all deserves a chance to get used. If I keep buying fabric, stuff will start getting lost in the madness. Speaking of the madness, my organization is slipping because I keep having to make accommodations for new fabrics. Hopefully if there is a set number, I can make my space a relaxing sewing haven that I am proud of.

Plus, I woke up with a decision about going for more grad school (Yes, more grad school. I'm a nut.), and it involves a move. Translation: My stash needs to shrink significantly over the next few years.

Fine Print: If I do happen to find one of the fabrics I have spent so long trying to find (think: Moda Lush line), I will probably allow myself to splurge. Come on, I am human and this isn't really a resolution.  :)

15 January 2013

Non-Quilty Crafty

Welcome! Please feel free to skip all of the ranty [goodness] and scroll on down to the pictures. I included the narrative mostly as an introspective tool for myself.

Even though I have been quilting for a few years now, up until recently, I would still say that I was scared to sew. [Sewing = The construction of practical, non-quilt things.] Over the past few months, I have been challenging myself to branch out of my comfort zone and teach myself to make useful and crafty sewn things.

Honestly, my main motivator was that I always intend on making a quilt (or 7) for myself to keep, but every time I make one, I see where I messed up, and am not happy with the end-product.

We are always our own harshest critic, I know. But still I would find myself frustrated with a seam, a wonky bit (or not-wonky enough bit, depending on the pattern), puckering, bunching, binding corners, etc.

These are all simple skills that I have improved upon significantly. But that being said, I am still human and these mistakes still happen. There is at least one highly noticeable (to me) flaw on almost everything I make.

These flaws, however insignificant in appearance to everyone else, left me discouraged and would frustrate me on a daily basis if I had inflicted the torture of looking at them every day upon myself.

So I give them away.

These quilts full of my absolute most cherished and prized fabrics on which I spent days/weeks/months of my time, energy, love, and money were given away because I do not want to look at them. When I realized what was happening, it broke my little heart. These were the fabrics I bought especially for myself to use on projects just for me, and they were gone.

Since a lot of time goes into making a quilt just to give it away (don't get me wrong, I love making, and make tons of quilts for other people, but I am talking about one intended to keep), I decided to learn how to make smaller, quicker things in the hopes that I not be so critical and end up keeping them. At least this way I would still have projects lovingly made with my favorite fabrics.

It started inauspiciously enough with a purse or tote bag here and there. I continued to press on and practice more projects.

My evil plan worked! Even though I could see the flaws in these smaller projects, my practicality overruled my perfectionism and their usefulness convinced me to keep them for myself! Score!

I decided to write a blog about some of these sewing projects I have been tackling lately, in the hope that it will:

  1. Motivate me to continue making useful projects.
  2. Help me to transfer my acceptance of these projects' flaws into other areas of my life and crafts.
  3. Trick me into trying to make another quilt for myself.
  4. Act as a therapeutic exercise. 
  5. Provide an opportunity for wonderful people to point me in the direction of more projects!
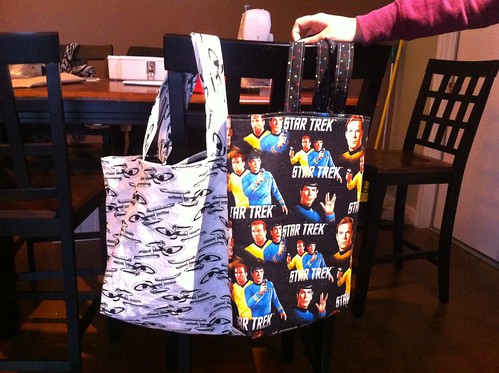
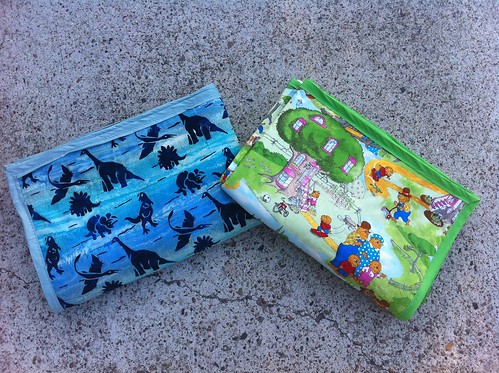
Tote bags were an easy place to start. I do not have pictures of all the patterns I have played around with, but this picture shows one of my favorites. This particular picture shows two Star Trek totes. I used this pattern to teach my cousin how to setup and use her brand new sewing machine since she had never sewn anything. It was a lot of fun!


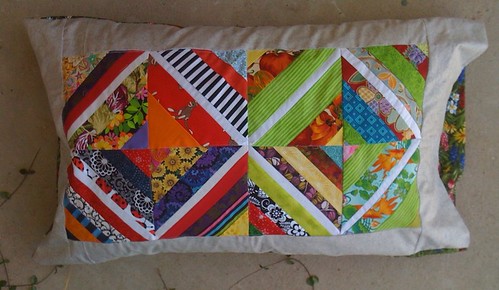
Pillowcases are also something easy to make. This one was actually made for my mom, but it is still practical, sewn, and crafty so I will let it slide.


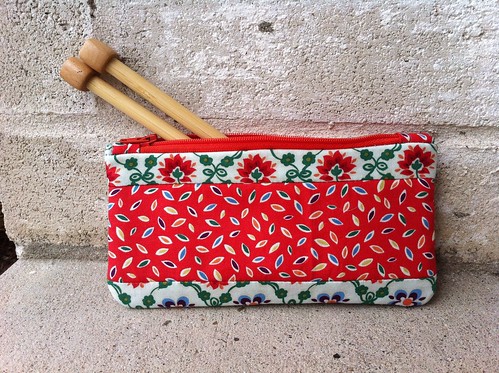
I also got over my irrational fear of zippers. Well, I'm in the process of getting over it. The fear is still palpable. This project was from a kit at my local brick and mortar quilt shop. I was tremendously proud of myself for it.


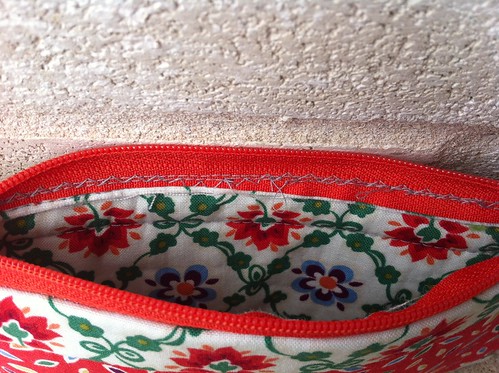
The flaw on it is okay with me, other than the fact that I want to know how to make it not happen. When I sewed over the zipper, it destroyed the tension on my machine. Is that normal? I'm guessing it won't happen on my new fancy Husqvana. Anyone have any insight/helpful tips?


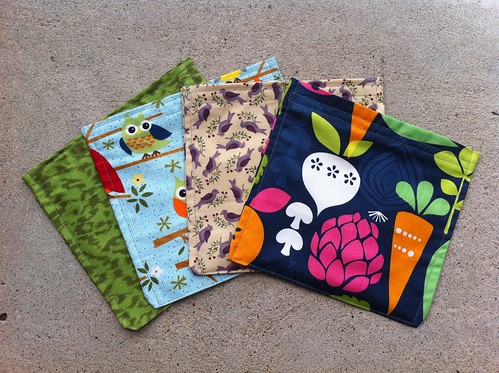
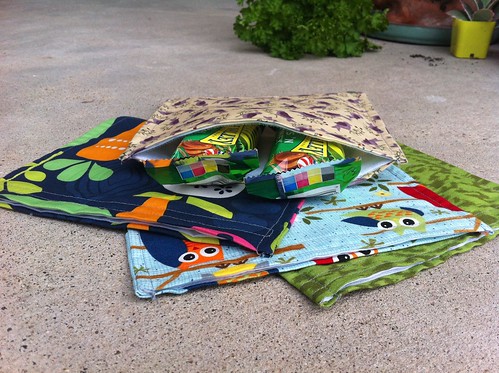
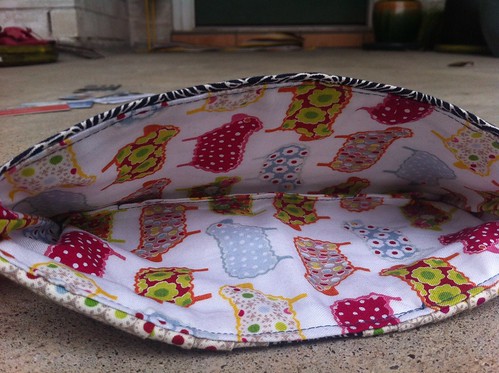
In an attempt to make my life more eco-friendly, I also made these adorable velcro sealed, rip-stop nylon lined snack bags right before the week long cruise I went on. They were perfect! We were able to take snacks on shore excursions with us to save money and possibly avoid parasites since some of the destinations had questionable reputations. I toyed with the idea of making 75 of these for my college students this semester. I'm hoping to talk myself out of that.


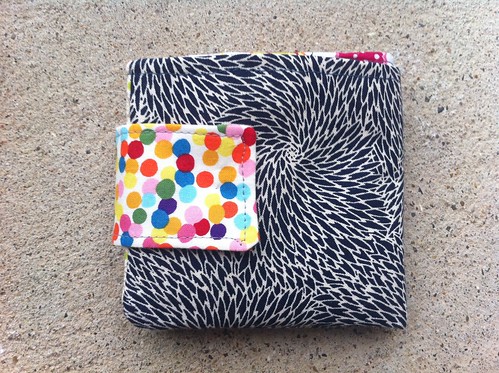
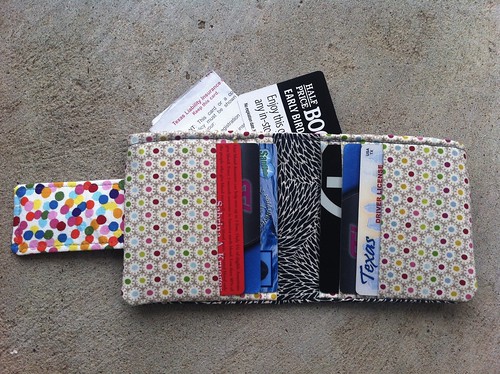
Last but not least, I made myself a wallet. I was finding it difficult to buy a wallet knowing that everything in stores was either too big, ugly, too small, or just not right. So what was stopping me from making the perfect wallet? Apparently nothing! I used some of my absolute favorites (main exterior fabric is from Japan and the lamb and interior fabric are both Dutch).


01 January 2013

Five Quilt Finishes

I have been out of town for the past 12 days, but am home for the next 12 hours until I leave town again for a few additional days. Upon my return, only 1/14 nights will have been spent in my bed, 4 countries will have been walked in, and 4 major cities in Texas will have been slept in and visited.

I should be soaking up this precious at-home interlude with some quality sewing machine time, but it feels silly to start something now. So my back-up plan was to blog, because, well, why not?

Look!

A blog!

INCONCEIVABLE!

Ahem. Instead of saying it has been so many months since my last post, I will say it has been 5 quilt finishes since my last post. All 5 of those finishes are in this picture-heavy blog, so please keep reading (or scrolling without reading)!

So what have I been working on over the past few months? Lots, actually.

I started working with English paper piecing, especially hexagons and have truly fallen in love with their portability. As a professor, I often find myself with 10 minute breaks while my students are taking daily attendance quizzes, or between classes. Such a short amount of time is not enough to run up to my office and accomplish anything worthwhile, but hexies fill this time quite nicely! I can baste up a few hexies during a break, and stash them away in seconds. All of the supplies take up as much space as a pencil bag, which means it all fits nicely in my purse.

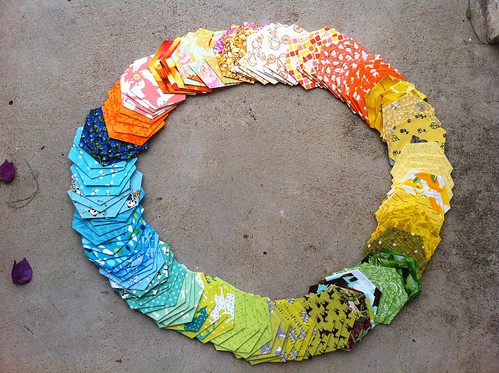
Here are the hexies I have done, thus far. They are for an eventual quilt for myself. This quilt is going to be an ongoing project.


On the cruise I just returned from, I started sewing some into rosettes. Yippee! There are no pictures of that stage yet.

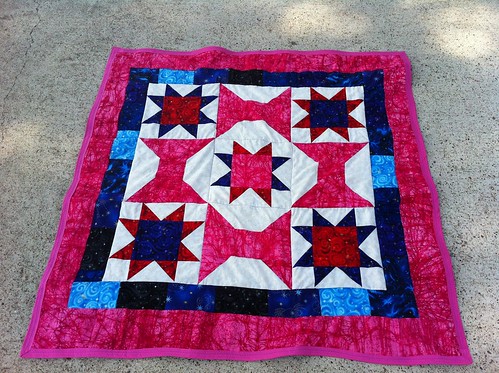
Now, on with the quilts! This one is the baby quilt for my cousin, his wife, and their new baby, KT.


The reason I am leaving town again tomorrow is to go visit them and meet the baby! She was a premie and had some health issues. This meant she was in the NICU when I tried to go meet her. Luckily, she is out of the hospital and healthy as can be. So excited to meet her!

Her father (my cousin) and I were like brother and sister when we were growing up, so she definitely feels like my niece.

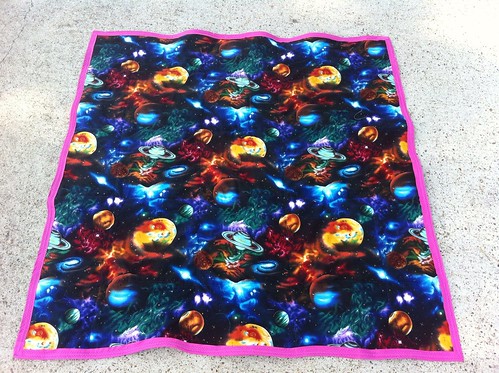
Here is the pretty back fabric for her quilt. Notice that it is not babyish at all. Yep, that is common with me.

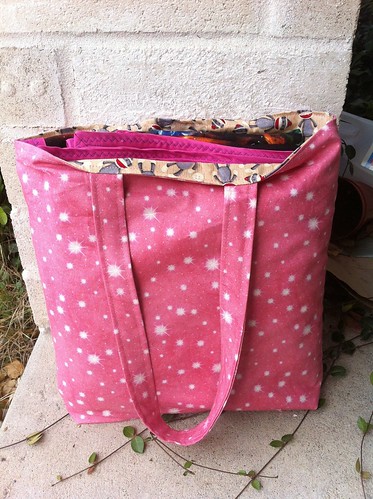
I even made a cute little reversible tote bag to give the quilt in! That would be pink starry fabric on one side, with sock monkeys on the other!

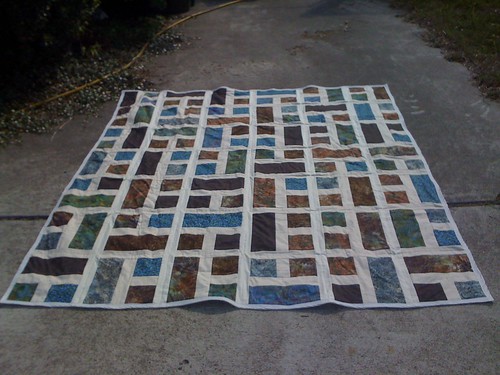
I also finished the wedding quilt for my friends on time! It came out better than I expected, considering I made up the pattern and the sheer size of it. The groom is very tall, and this turns out to be big enough to almost completely cover him.


In an interesting turn of events, I actually got to sleep with this quilt last night. The couple I made it for hosted a New Years Eve party/slumber party at their new house, and the quilt was up for grabs so I snagged it. This was very exciting for me, because I had never used a quilt of my own making. Mmm, it was so warm. Now I am exhilarated and ready to speed up my personal quilt projects.

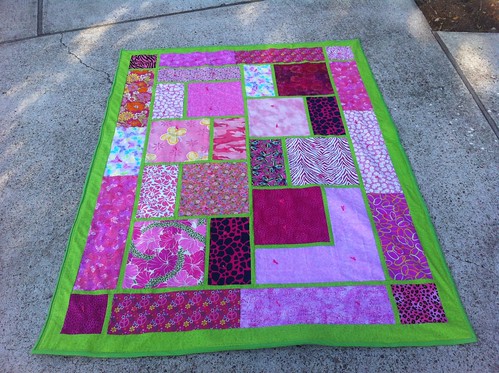
I also finished the door-prize quilt for the giant Christmas Scuba Club party thingamajig.


And even completed the two surprise quilts for another cousin's kids. These are the quilts I was stuck on way back here.

Chloe's quilt (Pattern found here) just needed to be basted, quilted, and bound. It came out nicely! FYI: Both of these quilts are tied because the batting was a thicker loft and I found it frustrating to quilt on the machine.


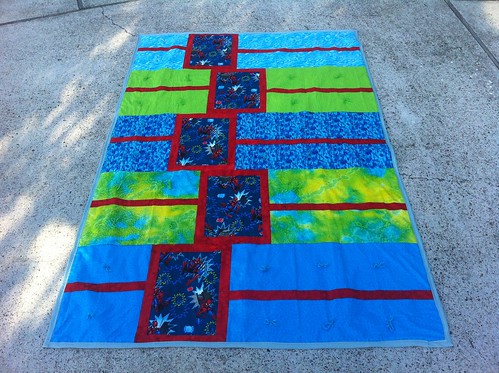
Jonathan's quilt was completely started over with a new pattern and new fabric. For whatever reason, my brain is not capable of completing the Moda Zig-Zag pattern. From now on, any zig-zags I do will be with HSTs.

Here is his new quilt, that is actually completed! (Pattern found here!)


And a close-up shot of the Spider Man detail on his quilt:


The backings ended up being the same as originally planned. Yay!


Wooo! Five completed quilts and a photo-heavy blog post: I am on a roll!

08 October 2012

Fat Quarter Organization

Let me begin with an extreme purchase of fabric that I feel pretty guilty about. I was planning on actually using all of this to make cute host/hostess gifts for my cousin and her boyfriend who are hosting Thanksgiving this year in their brand new [to them] house. I thought these colors would be fun while also a little autumny.


When I asked her about what she could really use and told her about the colors, she was thrilled! But then asked if I could use the colors from the housewarming quilt I made them. Here is a picture of that quilt.


As you can see, those are not at all the same colors. Luckily, I still had enough scraps leftover to make everything I wanted to make them. Pictures in a few weeks when I finish the backs. Fronts are done though! Yay!

So that left me with 24 fat quarters that I was not prepared to house in my limited and poorly organized stash. (My local brick & mortar quilt shop has a sale: Buy 10 fat quarters, get one free.) Well as the title implies, I have [finally] found a nearly perfect way to organize my fat quarters!!

Meet the answer to all one of my problems!


My boyfriend and I were out of town and needed to kill some time, so we went to the Container Store since I had never been. Our goal was to find some sort of shelf to keep my fat quarters on. A wire mesh CD tower appeared to be the best bet, until I found this by accident! We were ready to check out and in line, then he had a phone call, so I wandered through the random middle section and found it! Fat quarters fit PERFECTLY!


I was starting to put them in by color, then realized two things:
  1. I did not have enough room for all of my fat quarters in just one drawer. We only bought the one in case it didn't work. Next time we visit in a few weeks, I am definitely buying a few more!
  2. I was just so excited to see them fit in there that I really did not care about grouping them by color! 

I was able to fit 86 fat quarters in there!! Eighty six!!! Could have squeezed a few more in, but then the ones in the back would be more cramped, which leads us to the only flaw I am finding in this...

The poor fat quarters in the back.


Unless the drawer is removed completely, the last 4 fat quarters are difficult to look down upon and flip though. This is a minor problem, though. I can pull the drawer out completely and it is a non-issue, or I can put duplicates back there, fabrics I don't really like, or just put something rigid back there so they don't go all the way to the back. That would lose the space for about 4 fat quarters, but I was able to fit 86 fat quarters in there!! Eighty six!!! So really, losing 4 would not be the end of the world, considering I have enough in my stash to fill almost 3 of these bad boys.