For most of these I used size 1 yarn and US 3 needles, because that is what I had and it seemed to work well. If that is what you will be using, follow this. I have tips and tricks at the end.
Cast on about 29 stitches. There is a lot of wiggle room because you can stretch the rectangle later, or trim your card. I suggest anything between 27 and 31 stitches, but 29 seemed to work with most yarns I used.
Rows 1-5, Knit.
Row 6, Knit 4 for border, knit middle, knit 4 for border. (Borders are "garter" stitch)
Row 7, Knit 4 for border, purl middle, knit 4 for border.
Repeat Row 6 for even rows aka knit the even rows.
Repeat Row 7 for odd rows. (Odds and even combined is "stockinette" stitch)
After finishing an even row, Knit last 5 rows and bind off.
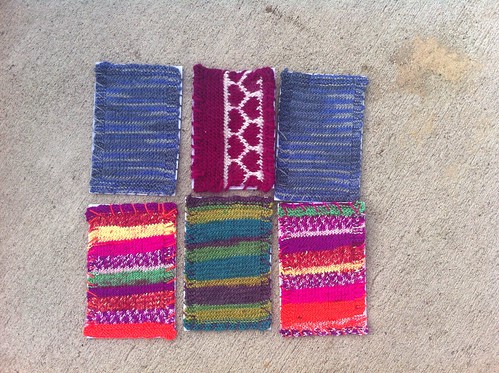
Then stitch the rectangle to a blank 4" x 6" card, like this. And that's it!

If you are like me and you forget to count, here is an easy guide to tell if you need to knit or purl.
If you are ready to start a row and it looks like this, you need to knit.

If you are about to start a row and it looks like this, you need to purl.


They DO make it through the mail, though you have to drop it off at the post office and pay a little extra because it can't go through the machines and needs to be sorted by hand ($0.70 for domestic, $1.35 for international). I sent one to my friend and she shared this photo with me after it arrived. Thanks, Toni!

Wow. A whole new craft has opened up to me--darn it! Wish I could just look-but-don't-touch, but you provided me with a *tutorial*. That's an open invitation to get out my knitting needles right this second.
ReplyDeleteThanks for linking to WIP Wednesday so I could discover something new.