Showing posts with label Fabric Stash. Show all posts

16 February 2018

Badge Holder Tutorial

I'm going to attempt to be as clear as I possibly can be with this tutorial, but the thought of writing it up came as a bit of an afterthought, so I don't have pictures of every step (specifically the beginning steps). I will be as verbally detailed as possible, but if anything is unclear, please let me know. The back pocket is totally optional, by the way. 

Materials:
  • 5" x 7" --piece of clear vinyl
  • 2 3/8" x 5.5" --binding for the top of the vinyl pocket
  • 5" x 8.5" --fabric for front/inside the vinyl pocket. About 1" will show above the vinyl pocket.
  • 5" x 8.5" --fabric for the back of the badge holder. About 2" will show above the back pocket, or a lot will show if you skip the optional back pocket. 
  • WOF x 2.5" --fabric for binding around the whole shebang, so match the front and back
  • WOF x 2.25" --strap fabric* You can make this a bit wider if you prefer. 
  • 2 pieces of 5" x 8.5" medium fusible interfacing. I used some that was super thin, so I used 4 pieces. 
*Optional Back pocket materials:
  • 2 pieces of fabric, 5" x 6" --fabric for back pocket. I pieced mine with scraps. 
  • 2 3/8" x 5.5" --binding for back pocket
  • 5" x 6" fusible interfacing
Step 1: Strap Construction
I have no photos of this step, but iron it in half lengthwise, then fold the long edges in to the middle and iron those creases. Topstitch down both long sides to keep it secure. Trim it down. Mine is about 36" long, but I'm a teensy bit short. I suggest draping it around your neck and figuring out where you want the badge to rest and trim an inch longer than that. Set it aside for now. 

Strap 2: Vinyl Pocket
Prep your vinyl pocket binding by pressing it in half lengthwise. Then you are going to machine it on. Center it on a 5" end of the vinyl and sew it down with a 3/8" seam. Fold it around and sew it down. Once it is sewn down, trim the edges to match the 5" width of the vinyl and set this aside for right now. I wish I could tell you some magic trick to make sewing vinyl easy. But it isn't. I've heard you can use special feet. I find it doesn't stick to the metal on my bobbin case as much as it does to the machine body itself, so I pull and tuck so it only touches the metal. 

Step 3: Main Body Construction
Begin by fusing one piece of interfacing to the wrong side of the front/inside of the vinyl pouch fabric. Fuse the other piece to the wrong side of the backing fabric. Put these two pieces WRONG sides together and baste around all four sides with about a 1/8" seam. 
Step 4: *Optional* Back Pocket Construction
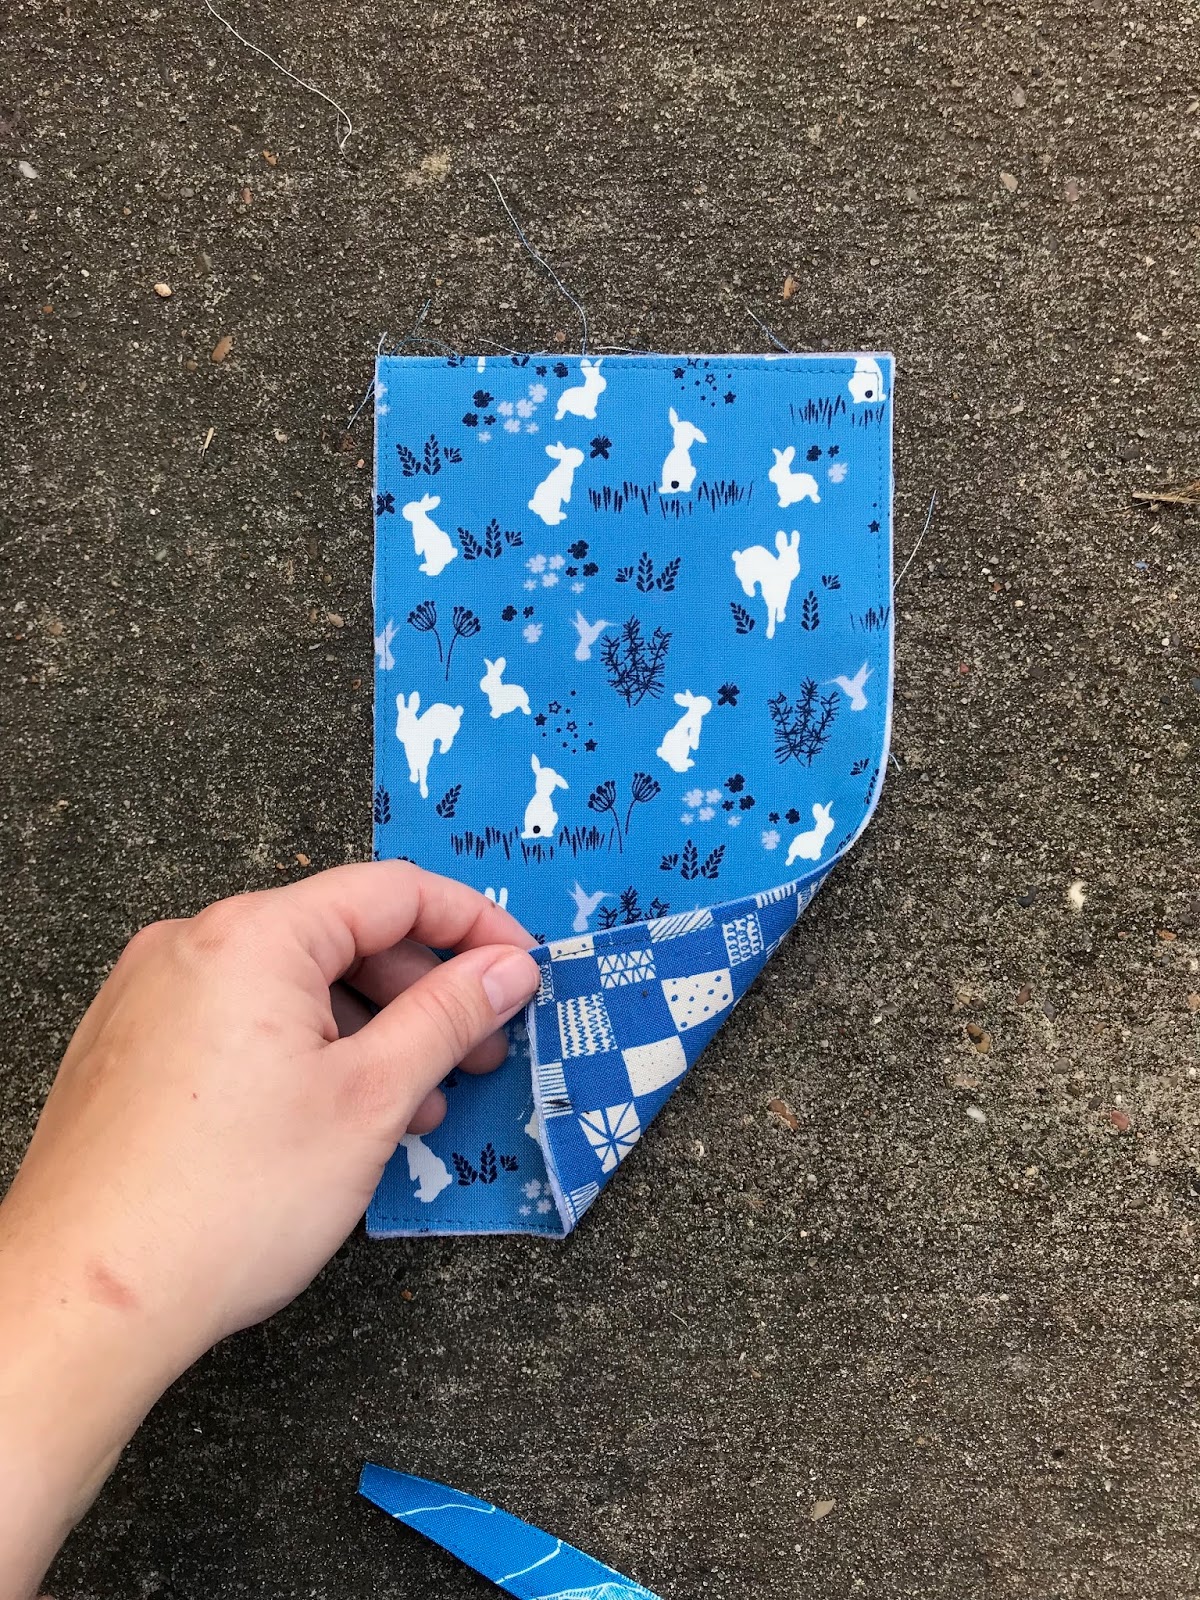
Fuse your piece of 5" x 6" interfacing to the wrong side of the outer fabric for your pocket. Put this piece and the lining fabric WRONG sides together and baste around all four sides with a 1/8" seam. Prep your pocket binding fabric by pressing it in half, lengthwise. Sew it onto the top of the pocket. I have been told I machine my bindings backwards. I sew them in place on the back side (lining), then fold over and machine them down on the front (outside) [Side note, I do the opposite if I'm hand stitching down the binding], so feel free to start on whichever side you want. You could also go crazy and hand stitch the binding down, but I was in a hurry so eff that. 

Step 5: Assembly
Start off by basting the back pocket piece to the bottom of the main body backing around three sides. Then baste the vinyl pocket to the bottom front of the main body. Again, vinyl is tricky, so do your best to keep it from sticking as you go. Position your straps about 1/2" from the edge on the back top of the pouch with the raw ends aligned with the top of the fabric, and baste them in place. Here's a picture to show what I mean. 

Step 6: Binding!
Now you are going to machine down your binding, just as you would on a regular quilt. Prep it by pressing it in half, lengthwise and pressing one short end under by about a 1/2". I'm not going to explain how to miter binding corners, but if you need a tutorial, the internet is full of them, though I suggest this one, except I only left the beginning bit loose for a length of about 1.5". Machine it in place, fold it over, and then sew it down by machine or by hand. I did the initial placement stitching from the back, then sewed it down on the front, but do what makes most sense to you. When you get to the top, make sure the strap is not caught anywhere, but you will be catching the strap ends since they are already basted in place. That's it! For a final bit of security, I put another row of stitching at the very top edge to hold the strap in place since it was pointing down after binding but needs to be pointing up. 

Step 7: Enjoy!


08 October 2013

Teeny Tiny Things

I decided on a plan for the next Mug Rug Revival Swap. My partner wants something holiday themed, which is awesome because I do not like holiday fabric for myself because I do not decorate, but I have had a few patterns floating around in my brain. So far I have strips with a bunch of little 1.5" squares and it doesn't really look like much, but it will!
I know it doesn't look like much right now, but it will!

I also finished 19.5/20 of the 3" half hexie pinwheels I am making (I say half because one is done, just backwards and one is done now but wasn't done in the picture) for the EPP 30s repro quilt. I had not conceptualized how big the quilt would come out with just 20 blocks. The answer is too dang small.
Untitled

It was smaller than a baby quilt, which is no good since I want this to be for me! So I decided to make a whole lot more half hexies before sewing pinwheels together so that it would still be random if my color ratios were off. Originally I had 4 each of red, yellow, blue, purple, & aqua/green. I collected a few (15) more fat quarters during the Quilt Across Texas shop hop in September. Between that, what I had in my stash (Uhhhm, how do I have that much 30s repro if I never use any?!), and adding in a four not 30s repro prints that match the color scheme, I now have 7 more fabrics in each of the 5 color ways. I have already cut these into strips and am toting them along everywhere with me. Maybe someday this quilt will be done.
Untitled

I also managed to finish the trivet I am making my boyfriend. It is a teeny tiny version[ish] of the quilt I made him ages ago. Here is the quilt, for reference.
Finished quilt for my boyfriend (72" x 72")

Here is the finished trivet. The quilting on the trivet is the antithesis of what I did in the quilt. The quilt had tidy diagonal lines spaced 2" apart while the trivet, well, not so much. I started with diagonal lines, but it just didn't look right with the light linen background so I went with a stipple.
FMQ trivet


Here is a close up of some of the quilting. I know my FMQ still has a lot of improving to do, but I am slowly getting there. Since it is for my boyfriend, I tried to add a little heart. It doesn't look too heart-like, but that just means it will be more camouflaged.
FMQ sneak peak! <3

The trivet has two layers of Insul-Bright, and the backing is grippy shelf liner so it will not slide around. I had sewn shelf liner before and it wasn't too difficult. This particular brand of shelf liner is insanely grippy, I suppose, because it was impossible to sew with my machine. What I did to overcome the obstacle was machine stitching the binding to the front through the front and two layers of batting. Then I turned the binding and stitched it to the back, but caught the shelf liner in these stitches to hold it in place. Viola; Grippy and heat resistant!
Trivet backed in grippy shelf liner stuff!

I also had some time to try a new recipe this weekend. It is for bacon jam empanadas with a really delicious cornmeal crust. They are basically the best thing ever. I'm hoping to write a tutorial for this soon. :)
Bacon jam empanadas with cornmeal crust!

27 March 2013

Better late than...

Never?

Pregnant? (As Blanche Deveroux from Golden Girls would say)

While both are important, this particular post will focus on the only relevant topic: Better late than never.

I am incredibly late for WIP Wednesday. Wait. It is only Wednesday. I'm not actually late. Woohoo! I just feel so rushed this week.

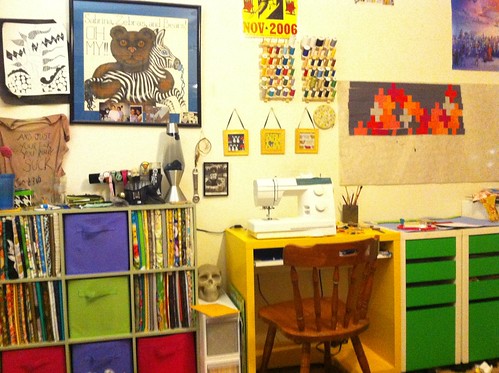
The only non-new project I worked on this week was sewing space/bedroom (same room, people!) organization. It is still incredibly cluttered, but it is starting to feel more usable. On the cube shelf to the left of the photo I have my yardages of fabric folded into tiny bolts so that they are easily accessible. In the plastic drawers under the concrete skull, I have fat quarter storage. (See this post for more info on the amazing and perfectly sized drawers!) They fit perfectly in these drawers! Finally in the lime green Ikea drawers, I have notions, interfacing, giant yardages for backing, tops, blocks, more fat quarters, BOMs I am horribly behind on, and yarn.


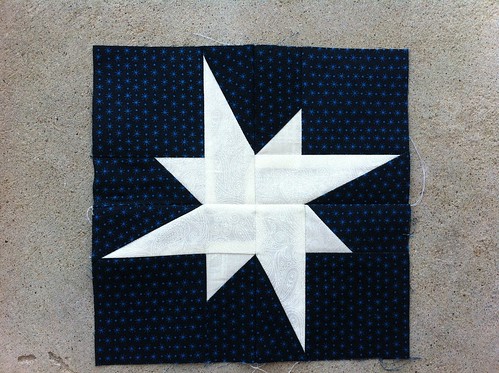
Aside from the colossal and seemingly endless monster that is organization, I really only worked on new projects this week. I finished the March block for Color Bee Shocked. Mallory wanted different stars (unfinished @ 8.5"). I used the galaxy star paper pieced pattern by Moira McSpadden.

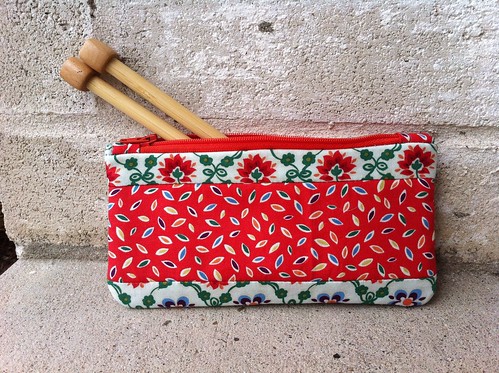
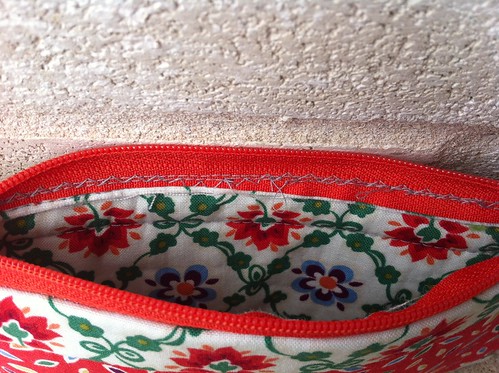
I also made two commissioned pouches for a coworker. The first one is a pencil pouch and the second one is a big carry-all bag for her GoPro and GoPro accessories.


As far as new projects go, I started working on the front and back for a pillowcase I am making. One side will be in cool colors, one side will be in warm colors.


The cool color side is nearly done!

I also started working on something secret. They looked so cute and garlandy after chain piecing that I had to snap a photo!

What could it be?! Oh, alright, I'll tell! It's a Dresden plate! Well, half of one. This is my first time playing with them and I am loving it! Sometimes handwork makes me very happy. :) As for what I'm using these for, you will have to stay tuned.


I am leaving you with an adorable picture I took at my favorite German restaurant. They drew my mustard into hearts! Aww!

17 January 2013

Resolute

This is not a new year's resolution. This is just something that hit me, and I want to try my best to stick to it.

I am not buying any fabric unless it is necessary for a project I am actually working on.

This means no more online fabric ordering in the middle of the night when I get fabric envy from someone else's projects.

This means no more picking up miscellaneous fabric when I visit new out of town shops on my travels just because it is something I like and can't get at home.

Realistically, this might mean no more visiting new shops.

What saddens me is that it means no more obligatory supporting of small business owners. At least I can sleep easy knowing my money will not be going into big box stores instead.

This means no more "oo, but this is my favorite fabric, so I have to buy it every chance I get!"

This is about clutter and chaos, not money (although hello added bonus). My stash runneth over, and I do not feel bad about that. But I know that I have picked up so much incredible fabric and it all deserves a chance to get used. If I keep buying fabric, stuff will start getting lost in the madness. Speaking of the madness, my organization is slipping because I keep having to make accommodations for new fabrics. Hopefully if there is a set number, I can make my space a relaxing sewing haven that I am proud of.

Plus, I woke up with a decision about going for more grad school (Yes, more grad school. I'm a nut.), and it involves a move. Translation: My stash needs to shrink significantly over the next few years.

Fine Print: If I do happen to find one of the fabrics I have spent so long trying to find (think: Moda Lush line), I will probably allow myself to splurge. Come on, I am human and this isn't really a resolution.  :)

15 January 2013

Non-Quilty Crafty

Welcome! Please feel free to skip all of the ranty [goodness] and scroll on down to the pictures. I included the narrative mostly as an introspective tool for myself.

Even though I have been quilting for a few years now, up until recently, I would still say that I was scared to sew. [Sewing = The construction of practical, non-quilt things.] Over the past few months, I have been challenging myself to branch out of my comfort zone and teach myself to make useful and crafty sewn things.

Honestly, my main motivator was that I always intend on making a quilt (or 7) for myself to keep, but every time I make one, I see where I messed up, and am not happy with the end-product.

We are always our own harshest critic, I know. But still I would find myself frustrated with a seam, a wonky bit (or not-wonky enough bit, depending on the pattern), puckering, bunching, binding corners, etc.

These are all simple skills that I have improved upon significantly. But that being said, I am still human and these mistakes still happen. There is at least one highly noticeable (to me) flaw on almost everything I make.

These flaws, however insignificant in appearance to everyone else, left me discouraged and would frustrate me on a daily basis if I had inflicted the torture of looking at them every day upon myself.

So I give them away.

These quilts full of my absolute most cherished and prized fabrics on which I spent days/weeks/months of my time, energy, love, and money were given away because I do not want to look at them. When I realized what was happening, it broke my little heart. These were the fabrics I bought especially for myself to use on projects just for me, and they were gone.

Since a lot of time goes into making a quilt just to give it away (don't get me wrong, I love making, and make tons of quilts for other people, but I am talking about one intended to keep), I decided to learn how to make smaller, quicker things in the hopes that I not be so critical and end up keeping them. At least this way I would still have projects lovingly made with my favorite fabrics.

It started inauspiciously enough with a purse or tote bag here and there. I continued to press on and practice more projects.

My evil plan worked! Even though I could see the flaws in these smaller projects, my practicality overruled my perfectionism and their usefulness convinced me to keep them for myself! Score!

I decided to write a blog about some of these sewing projects I have been tackling lately, in the hope that it will:

  1. Motivate me to continue making useful projects.
  2. Help me to transfer my acceptance of these projects' flaws into other areas of my life and crafts.
  3. Trick me into trying to make another quilt for myself.
  4. Act as a therapeutic exercise. 
  5. Provide an opportunity for wonderful people to point me in the direction of more projects!
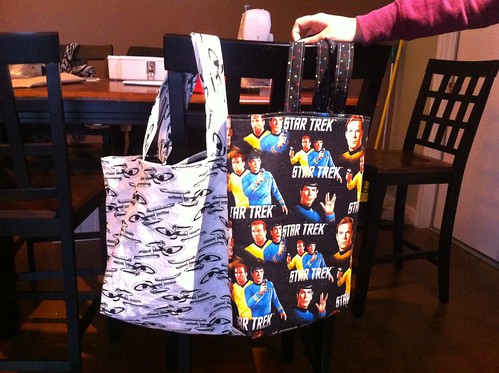
Tote bags were an easy place to start. I do not have pictures of all the patterns I have played around with, but this picture shows one of my favorites. This particular picture shows two Star Trek totes. I used this pattern to teach my cousin how to setup and use her brand new sewing machine since she had never sewn anything. It was a lot of fun!


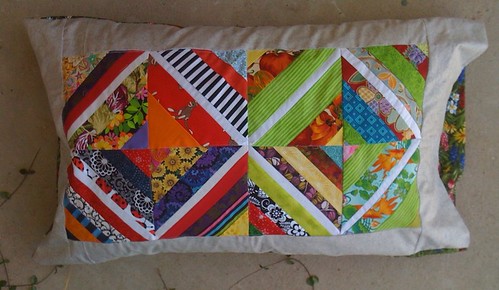
Pillowcases are also something easy to make. This one was actually made for my mom, but it is still practical, sewn, and crafty so I will let it slide.


I also got over my irrational fear of zippers. Well, I'm in the process of getting over it. The fear is still palpable. This project was from a kit at my local brick and mortar quilt shop. I was tremendously proud of myself for it.


The flaw on it is okay with me, other than the fact that I want to know how to make it not happen. When I sewed over the zipper, it destroyed the tension on my machine. Is that normal? I'm guessing it won't happen on my new fancy Husqvana. Anyone have any insight/helpful tips?


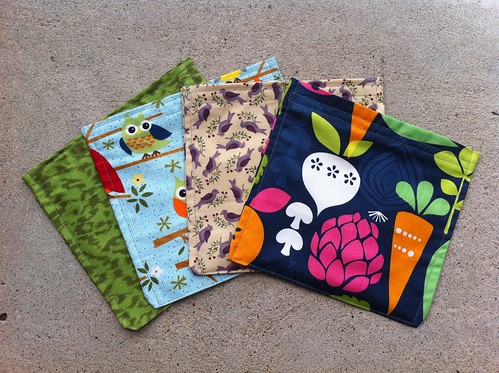
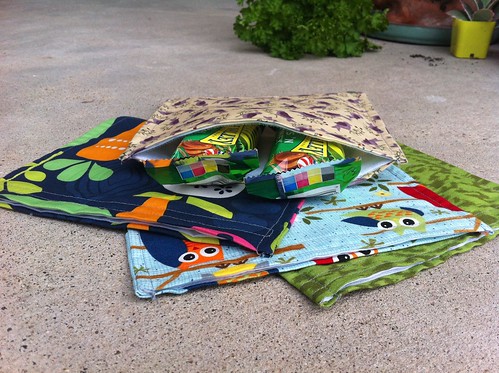
In an attempt to make my life more eco-friendly, I also made these adorable velcro sealed, rip-stop nylon lined snack bags right before the week long cruise I went on. They were perfect! We were able to take snacks on shore excursions with us to save money and possibly avoid parasites since some of the destinations had questionable reputations. I toyed with the idea of making 75 of these for my college students this semester. I'm hoping to talk myself out of that.


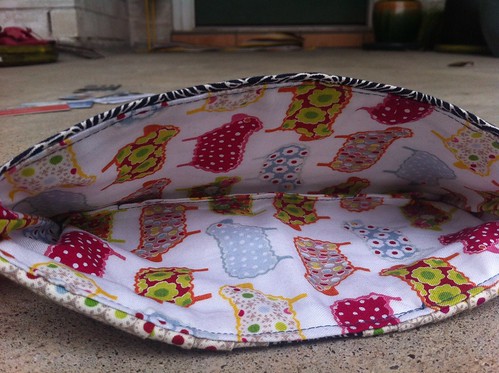
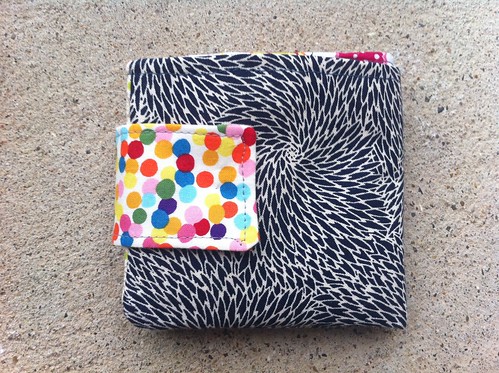
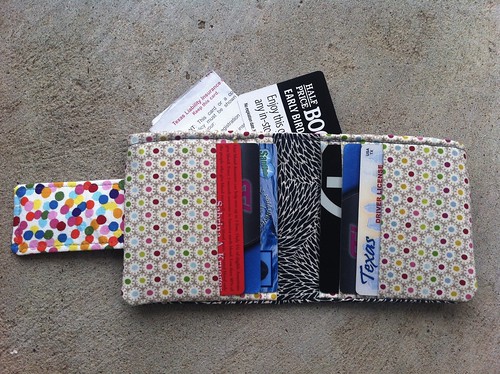
Last but not least, I made myself a wallet. I was finding it difficult to buy a wallet knowing that everything in stores was either too big, ugly, too small, or just not right. So what was stopping me from making the perfect wallet? Apparently nothing! I used some of my absolute favorites (main exterior fabric is from Japan and the lamb and interior fabric are both Dutch).


08 October 2012

Fat Quarter Organization

Let me begin with an extreme purchase of fabric that I feel pretty guilty about. I was planning on actually using all of this to make cute host/hostess gifts for my cousin and her boyfriend who are hosting Thanksgiving this year in their brand new [to them] house. I thought these colors would be fun while also a little autumny.


When I asked her about what she could really use and told her about the colors, she was thrilled! But then asked if I could use the colors from the housewarming quilt I made them. Here is a picture of that quilt.


As you can see, those are not at all the same colors. Luckily, I still had enough scraps leftover to make everything I wanted to make them. Pictures in a few weeks when I finish the backs. Fronts are done though! Yay!

So that left me with 24 fat quarters that I was not prepared to house in my limited and poorly organized stash. (My local brick & mortar quilt shop has a sale: Buy 10 fat quarters, get one free.) Well as the title implies, I have [finally] found a nearly perfect way to organize my fat quarters!!

Meet the answer to all one of my problems!


My boyfriend and I were out of town and needed to kill some time, so we went to the Container Store since I had never been. Our goal was to find some sort of shelf to keep my fat quarters on. A wire mesh CD tower appeared to be the best bet, until I found this by accident! We were ready to check out and in line, then he had a phone call, so I wandered through the random middle section and found it! Fat quarters fit PERFECTLY!


I was starting to put them in by color, then realized two things:
  1. I did not have enough room for all of my fat quarters in just one drawer. We only bought the one in case it didn't work. Next time we visit in a few weeks, I am definitely buying a few more!
  2. I was just so excited to see them fit in there that I really did not care about grouping them by color! 

I was able to fit 86 fat quarters in there!! Eighty six!!! Could have squeezed a few more in, but then the ones in the back would be more cramped, which leads us to the only flaw I am finding in this...

The poor fat quarters in the back.


Unless the drawer is removed completely, the last 4 fat quarters are difficult to look down upon and flip though. This is a minor problem, though. I can pull the drawer out completely and it is a non-issue, or I can put duplicates back there, fabrics I don't really like, or just put something rigid back there so they don't go all the way to the back. That would lose the space for about 4 fat quarters, but I was able to fit 86 fat quarters in there!! Eighty six!!! So really, losing 4 would not be the end of the world, considering I have enough in my stash to fill almost 3 of these bad boys.

07 August 2012

Better Block Pictures!

When I started this first month of bee blocks, I thought my stash was pretty diverse. I had these big hopes of being able to meet the color requests of every person in my hive by pulling from my stash (which is perfect because then I get to buy more fabric!). Unfortunately, I realized I stick to colors in my comfort zone and that there were some serious gaps.

Exhibit A: I owned absolutely no white fabric. It just scares me because I think it will look dirty and I make quilts in the hope that they will be loved to shreds.

So, off I ventured to my local quilt store and I came home with way too much fabric. I'm taking, 24 fat quarters too much. Ack! I only ended up using the white I bought and 2 fat quarters. Everything else did in fact come from my stash.

Moral of the story? I subconsciously underestimate my stash in order to convince myself that I need more fabric.

Admitting that I have a problem is the first step to recovery, right? ;)

Onwards and upwards! First off, here is a vastly improved shot of all the blocks together. Look! You can even tell that the whites of the backgrounds are made out of the the pretty new white I just bought yeterday! What a novel concept.


Next I will give a little recap of who the individual blocks were for, and what colors they requested so that I can maximize my bee-enthusiasm!

This one was my test block that I made in my colors. My colors being code for crappy scraps I found that had to get used.


Then we have the block for Laura. She requested rainbow colors, but not too bright. In my head, I kept thinking "muted rainbow" which seems to me like it would have a negative connotation. Why is that? Is muted a bad word when it comes to color? Whatever. I call this muted rainbow, and I hope she enjoys it!


Then we have the block for Jodie. She is making a baby quilt for her newest addition and requested blues and greens but preferably baby boy prints. I loved these trucks and thought any boy would be excited about them. Then the stars (asterisks?) were thrown in because I thought the colors go really well together!


Next up, we have the block for Alison. She requested blues, purples, and tans with a background in either white or any of the main colors. I love blues and purples together with tan, so I opted to use tan as the background instead of white. This block is pretty in-your-face, but I think she will like it!


Lastly, we have the block for Jan, our fearless leader for the month. Jan requested a block in blues and reds with a white background. Can I just say that I absolutely love all of the fabrics in this block. These were the only 2 reds I had in my stash that I didn't want to give up, but I decided this would be a good use for them. Plus, I still have oodles of each.


I hope all the women in my hive enjoy their blocks as much as I enjoyed making them! Now the only unresolved questions is why the heck did I finish these blocks so early in the month? Now I have to wait until September! Wahwahwahhh!