Showing posts with label Recipe. Show all posts

20 January 2015

Syrniki Recipe

I love cooking! I love Postcrossing! I love having breakfast for dinner! I especially love when these two hobbies and one passion collide, as they recently did with the making of this delectable Postcrossing-inspired, breakfast for dinner extravaganza: Syrniki.
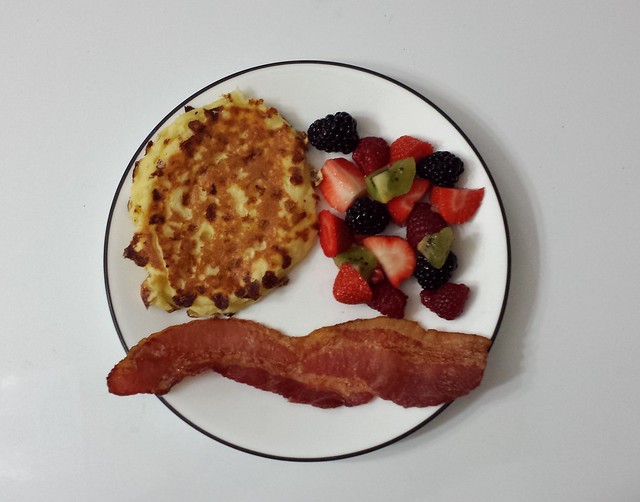
Syrniki

It all started when I received a gorgeous recipe postcard from Belarus. For those of you who might not be geographically inclined, let me begin by giving you a teensy bit of background information about The Republic of Belarus, which can be found here:

Belarus declared their independence from the Soviet Union in 1990, and now is home to roughly 9.5 million people. The capitol is Minsk (where more than 1/5 of the population lives). Perhaps one of my favorite Belarusian tidbits is that they have insanely gorgeous stamps! Every time I receive a Postcrossing postcard from Belarus, I am blown away by the stamps! Their wildlife collection is far-and-away my favorite.

Oh, yes, I was talking about a specific postcard before my propensity to go off on geographical and philatelic tangents took over. This postcard, to be exact:

Ain't she a beaut? 

The pictured syrniki, or Belarusian cheese pancakes looked delicious, so Anjo and I decided to try making them (after perusing the interwebs for other syrniki recipes to make sure the postcard recipe was comparable. I'm on to you, cake recipe card I purchased in France!). 

They turned out as delicious as we could have imagined. These are not going to feel like your typical breakfasty pancakes. They are much more dense, quite filling, and oh-so-tasty! Naturally I would expect this given that the average winter temperature in Minsk, (the capitol, in case you forgot) is 20.46 F degrees (or -6.41C). In that kind of weather, you need hearty food! ...Said the Texas gal who lives where it has not even dipped below freezing this winter. 

After making the recipe twice, Anjo and I have filled in the gaps that were in the postcard version. I hope you enjoy these as much as we did! Spoiler alert for your tastebuds: Anjo said these are officially his favorite pancake. 

Syrniki
  • 2 eggs
  • 500 grams of cottage cheese
  • 1 Tbsp. baking powder
  • 4-6 Tbsp. sugar
  • scant 1/2 tsp. salt
  • 1.5 cups flour
  • oil for cooking (I used vegetable, the card suggests sunflower)
1) Crack 2 eggs in a bowl.

2) Add 500 grams of cottage cheese and mix. It will stay lumpy. I tried to measure it out in cups, but a scale really worked best.

3) Add 1.5 cups of flour, a scant 1/2 teaspoon of salt (I just don't have a 1/3 tsp. scoop!) and 1 tablespoon of baking powder, and mix. I found varying info about how much a "packet" of baking powder contains, but this amount seemed to give the pancakes a wonderful texture, so I'm sticking with it.

4) Add 4-6 tablespoons of sugar and mix. The postcard called for 6-7 tablespoons, so we tried 6 the first time and it was too sweet for us. Four tablespoons made for a nice and savory pancake. Basically, add how much sugar your heart tells you to... Provided it is somewhere around the 4-6 range.

5) Heat a splash of oil in a pan. Add batter to the now heated, and oiled pan. A 1/3 cup measuring scoop works well at keeping the pancake sizes even.

6) Cook the pancakes covered for about 5 minutes, over medium low.

7) They should look about like this when they are ready to flip. 

8) Carefully flip them. Cook on the second side for about 3 minutes. If they are too brown or too pale after flipping, adjust either your heat or the length of time on each side. Not all stovetops work exactly the same.

9) Transfer to a paper towel lined plate/tray and dab some of the grease off. Or just eat them greasy. This is a judgment-free grease dabbing zone. Apologies for the gratuitous engagement ring shot! 

10) Enjoy! The postcard suggests topping the pancakes with sour cream, but syrup would also work if you are trying to convince these pancakes to be more like other pancakes. Personally I feel they are fine without any topping, but a nice serving of fruit and a slice of bacon definitely rounds out the plate. Eat them hot or put them in the fridge and microwave them later. If they get too soggy after microwaving, pop them in the toaster oven for a bit to crisp them up. 

24 December 2014

Lemon, Cranberry, Pecan Scone Recipe

I wish there was enough time to update my blog properly with all the sewing and crafting I have been accomplishing lately, but there just isn't. I have also been doing a decent amount of cooking and baking, so here we go with my new favorite recipe: Lemon, cranberry, and pecan scones! The lemons came from the lemon tree in my fiance's friend's yard. The pecans came from my mom's friend's yard.

Lemon, Cranberry, and Pecan Scones

Lemon, cranberry, pecan scones!
Ingredients
  • 2.5 cup flour (I prefer unbleached)
  • 1/3 cup sugar
  • 1 tablespoon baking powder
  • 1/2 teaspoon salt
  • zest of 2 lemons (if you feel bad about wasting the juice, you can make lemonade or mix some lemon juice with powdered sugar to drizzle on the scones)
  • 12 tablespoons COLD butter (1.5 sticks, cut into 1/2" cubes)
  • 2 eggs
  • 1/2 cup heavy cream
  • 1/2 cup chopped pecans
  • 1 cup fresh cranberries, cut in half if they are huge
Directions
  1. Preheat an oven to 375. Line baking sheets with parchment paper or spray them. Set these aside. 
  2. Mix flour, sugar, baking powder, salt and lemon zest. 
  3. Add in the cold cubed butter. It needs to be cold so that when it bakes it expands and leaves air pockets of deliciousness. Mix the butter either with your hands or a mixer until it seems well incorporated and has the consistency of peas. 
  4. Put this bowl in the fridge while you whisk the eggs to scramble them. Then add the heavy cream to this and whisk well. 
  5. Get the dry/butter mixture out of the fridge and add the egg/cream mixture. You will need a mixer to combine these. Trust me, it will be thick. 
  6. Then add in the pecans and mix well. 
  7. Finally you need to add in the cranberries. Do not over-mix or you will break them and turn the dough pink. 
  8. Separate the dough into 8-10 equal blobs and plop them onto your prepared baking sheets. 
  9. Bake for 20-21 minutes or until the scones are golden brown and a toothpick comes out clean. 
  10. Then enjoy!

23 September 2014

Broccoli Cheese Soup Recipe

I love broccoli cheese soup! Luckily it is so simple to make. I like to joke that it is easier to make broccoli cheese soup from scratch than it is to fight an electric can opener in order to open a can of it.

Ingredients
  • 1/2 cup (1 stick) butter
  • 1-2 onions, diced (I usually use 1 but accidentally bought 2 once and it was extra tasty!)
  • 4-6 cloves of garlic, minced (you can use more if you love garlic or if your city is plagued with mosquitos)
  • 1/3 cup all-purpose flour
  • 2 cups of milk
  • 2 cups of broth (veggie, chicken, or beef)
  • 2 cups half-and-half
  • 1/4 tsp. nutmeg
  • 4 heads of broccoli, chopped
  • salt and pepper
  • 3 cups grated, extra-sharp cheddar
Directions

Peel and mince your garlic.

Also dice up your onions. I have swim goggles that I wear when chopping onions. They work really well! No more tears!

Wash your broccoli heads.

Chop those up, as well. I like bigger pieces of broccoli and I also use a majority of the stems (just not the big central stalk).

Now we are done with prep-work and can start cooking! Melt the butter in a large pot over medium heat. Add the onions and garlic to this. Cook until they are starting to brown just a tad (3-4 minutes), and add the flour. It will thicken quickly! So quickly that I couldn't stir and get a picture. *sigh*

Stir that for about a minute, and then add your milk, broth, and half-and-half. I used beef broth. More specifically, I used 2 cups of water and one of the gelatinous broth blobs that Knorr makes.

Once it is all mixed up, add in your nutmeg and keep mixing.

Then add in the broccoli, salt, and pepper. I always hate recipes that don't tell you how much salt and pepper to use, but I was getting sick when I made this, so my amounts were probably insane. When in doubt, use too little, and add more to each serving individually.

Reduce heat to low, cover, and simmer, stirring the soup up every 5 minutes or so.

Once the broccoli is tender, which can take 20-30 minutes, remove the soup from the heat and add in the grated cheddar and mix until it all melts in.

Then you have lots of options. You can serve the soup in bowls...

Or you could whip up some bread bowls and serve the soup in that. Recipe for bread bowls can be found over here.

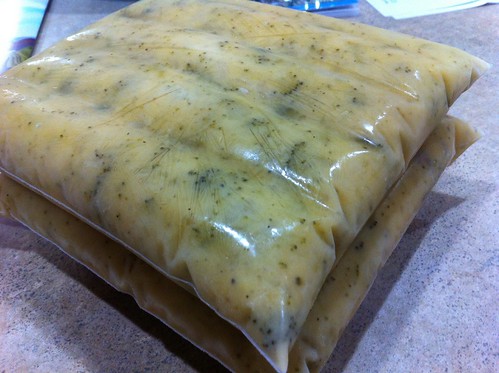
Or you can freeze it up for later. It microwaves well, so putting leftovers in the refrigerator also works well. 
Frozen broccoli cheese soup

18 September 2014

Dulce de Leche Cupcakes

These cupcakes without the caramel stuffing are tasty; with caramel stuffing, they are ridiculously tasty! They are dense, which is especially important if you plan on stuffing them because they are easy to cut.

Picture-less recipe is at the bottom of this post. 

Before you start the cupcakes, you need to leave 8 hours to make the easy peasy dulce de leche. To do this, take a can of sweetened condensed milk and remove all labels. Throw it in a crock pot on low for 8 hours. After it cools, you have dulce de leche or easy peasy, gooey caramel!

Then we start on the cupcakes. It might seem tedious, but this recipe uses two bowls. In the first, add the flour, salt, baking powder, and baking soda. Mix this up.

In the second bowl, combine the sugar and eggs.

Mix these together.

Keep mixing until they are kind of frothy.

Add the vanilla.

Then add the butter and mix again.

Then add this wet mixture to your dry mixture and mix. Mix. Mix. Mix.

Then you add some sour cream. Can you guess what you do next? MIX!

Then you scoop your batter into wrapper lined cupcake pans.

Bake 10 minutes, then rotate the pans. This is what they look like after 10 minutes.

Then bake them for 10 more minutes and they should be done and will look like this.

Mmm! Beautiful cupcakes!

If you plan on stuffing them, cut about a 1" hole out of the middle.

Then fill the cavities with gooey caramel goodness.

While you are at it, add some caramel to your frosting!

Then frost. I use a single recipe of frosting for a double batch of cupcakes because I do not like a lot of frosting.

Then enjoy your cupcakes!

If you want the cupcakes to be salted caramel, simply add a dash of coarse salt right before serving. Om nom nom.


Directions

  • Prepare caramel by putting a can of sweetened condensed milk (with labels removed) in a crock pot on low for 8 hours.
  • Preheat the oven to 350 degrees. Line pans with cupcake wrappers. Single makes about a baker's dozen, double makes about 29.
  • In bowl one, mix together the flour, baking powder, baking soda, and salt.
  • In bowl two, beat together the sugar and eggs until slightly frothy. This can take up to 2 minutes.
  • Add the vanilla and beat together.
  • Add the butter and beat together.
  • Combine mixtures from bowls one and two with beater.
  • Mix in the sour cream.
  • Fill the cupcake wrappers. 
  • Bake for 10 minutes, then rotate pans. 
  • Bake for another 10 minutes or until cupcakes are golden and a toothpick comes out clean.
  • Once cupcakes are cooled, cut a small circle out of the top. 
  • Divide the caramel between the cupcakes, reserving some for the icing.
  • Prepare icing by beating together softened butter, powdered sugar, and caramel until smooth.
  • Frost the cupcakes.
  • If you want salted caramel cupcakes, sprinkle tops of cupcakes with coarse salt just before serving.
  • Enjoy!

10 September 2014

Brunch & Two Recipes

Last weekend my boyfriend's sister and her boyfriend were in town. We all wanted to get brunch together but couldn't decide on a place. Then it occurred to me that we should cook for them! We bought our new souffle dish while visiting them  and hadn't yet tried it out. Since souffle needs a reason, this seemed like a good one! Last time we made souffle, the dish we had wasn't big enough so we had to also use two smaller ramekins which was a hassle.

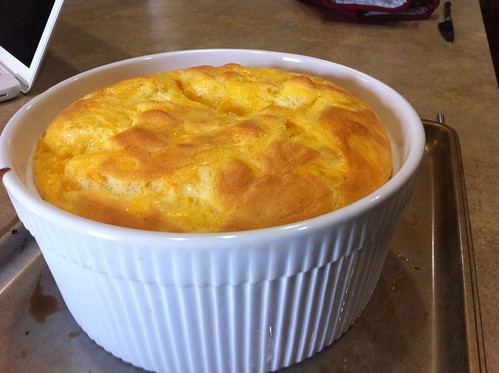
But this time we had the perfect vessel for souffle cooking! Look how perfectly it fluffed up and fit in the container! Yess!  We followed Julia Child's cheese souffle recipe.
We finally found the perfect sized bowl for the souffle recipe we love. Yes!

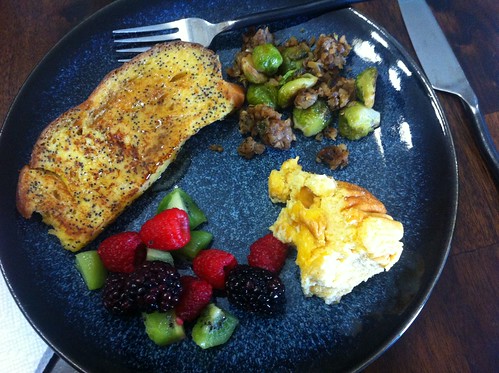
In addition to the cheese souffle, brunch consisted of fresh fruit, lemon poppy seed French toast (made with the challah bread I baked last week), and Brussels sprout hash! It was incredible.
We made brunch: Lemon poppy seed french toast, brussels sprout hash, cheese souffle, and fresh fruit.

Today I'm going to share two of my favorite brunchy recipes, lemon poppy seed French toast and Brussels sprout hash. First up:

Lemon Poppy Seed French Toast.
Ingredients for about 4 servings:
  • 3-4 eggs (depending on size)
  • 1/4 cup + 1 Tbsp milk
  • Anywhere from 2 tsp-1 Tbsp poppy seeds (depending on what you prefer)
  • 1 tsp almond extract
  • 2 Tbsp lemon curd (this is totally optional but I love the taste it adds. If you commit to a jar of it though, you are going to have to make this recipe at least 4 times before it expires. How sad! If you don't want to buy lemon curd, add extra juice and maybe some lemon zest and/or marmalade)
  • 1 Tbsp lemon juice (or juice from one lemon)
  • 6-8 slices thick cut bread (I use challah but anything would work)
  • about 2 Tbsp butter
Mix eggs, milk, poppy seeds, almond extract, and lemon curd in a bowl. Slice up your bread. Mix in lemon juice (I save this for last because once I added it after only the milk was in the bowl and the milk started to curdle). Pour the liquid mixture into some kind of pan or flat baking sheet. Put the bread in the mixture and flip is so that each side is covered. Melt about 1/2 Tbsp in pan over medium heat. Cook french toast until golden brown and flip. Once the second side is golden brown, you're done! If your pan is small, add another 1/2 Tbsp of butter for each batch. 

Brussels Sprout Hash
  • 1/2 package of grated frozen hash brown potatoes
  • 1 package Brussels sprouts, washed, trimmed, and cut in half
  • 1 yellow onion, minced
  • 4 cloves of garlic, minced
  • 1 Tbsp. canola oil or vegetable oil
  • 1 tsp. lemon pepper
  • 2 tsp. dried parsley
  • salt and pepper, to taste (you might not need more pepper if the lemon pepper is enough)
Heat oil in a pan and add onions, garlic, and potatoes. Cook over medium heat, stirring constantly until the potatoes start to turn golden brown, this might take up to about 10 minutes. I use a non-stick ceramic pan so that I can easily scrape up the delicious crunchy bits. Once the potatoes are looking extra delicious, add in the seasonings and Brussels sprouts. Cook for about 5 more minutes so that the Brussels sprouts can get tender, then enjoy! I always serve this with eggs of some sort.


30 June 2014

Sewing and Cooking (Plus Recipe)

Let me preface this post by saying that I have no sewing machine. This makes my soul hurt and my sewing table looks so wrong. Luckily it isn't gone for good, just getting some routine maintenance done, which could take up to four weeks. Ahhhh!

Right before I dropped off my machine, I whipped up this skirt. I didn't follow a pattern or tutorial, just copied something I like from my closet and went to work!
Untitled

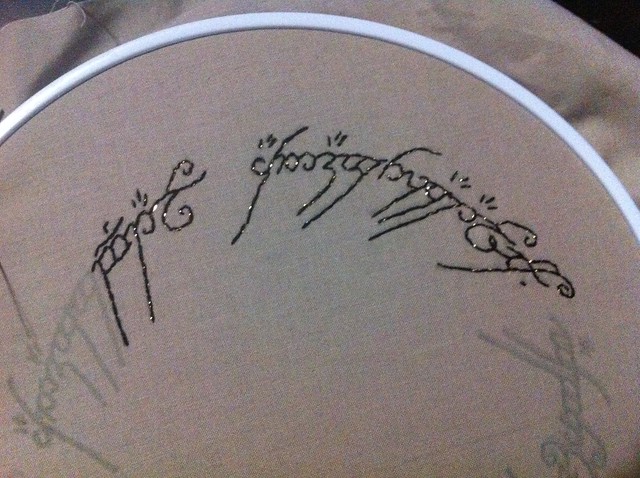
To tide me over, I have been working on some hand stitching. Here you can see the completion of one embroidery project and the start of another.
Untitled

Bunny is in perle, everything else is regular DMC floss. The bunny is also on its way to a new home!
Untitled

Untitled

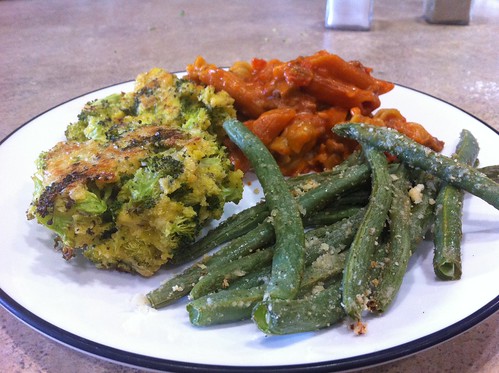
Also cooking! There has been plenty of cooking as of late including a wonderful collection of things on the menu for tonight. Cheeseburger macaroni (think Hamburger Helper, but not from a box) which was super tasty, some parmesan baked green beans, and cheesy broccoli "bites." There was absolutely no way to roll the broccoli into bite sized pieces, so I decided to call them something bigger. At first I went with hills, then mounds, and finally it came to me... Broccoli batholiths! All three were so tasty and the flavor combos were perfect together. Broccoli Batholiths & Cheeseburger Macaroni & Parmesan Green Bean Fries
Untitled

FYI: A batholith is a giant [almost] mountain sized rock. We have one here in Texas, Enchanted Rock, that my family has climbed almost every year since the 30s. Fun fact! You can't say batholith without sounding like someone with a lisp saying "basilisk."

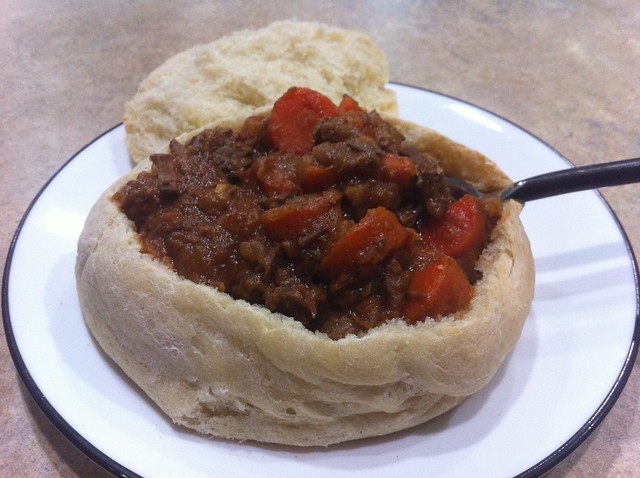
Next we have Guinness Stew with homemade bread bowls. Bread bowls were the first bread I ever made and they are so simple. After years of practice, here is my recipe.
Untitled

Homemade Bread Bowls

  • 1 package active dry yeast
  • 1.25 cups warm water (110F degrees)
  • 1 teaspoon granulated sugar
  • 1.5 teaspoon salt
  • 1/4 teaspoon garlic powder
  • 1 tablespoon vegetable oil or olive oil (plus a teensy bit more for greasing bowl when dough is rising)
  • 3.5-4 cups flour
  • parchment paper to cover baking sheet
  • corn meal, for sprinkling on parchment paper
  1. Dissolve and mix yeast and sugar in warm water. Let it sit, untouched, for 10 minutes.
  2. Mix in salt, garlic powder, oil, and 2 cups of flour. 
  3. Mix in remaining flour 1/2 cup at a time until it is just starting to not stick to everything like crazy. You might not need to add it all. 
  4. Knead the dough for about 5-6 minutes.
  5. Oil your mixing bowl and put the dough ball back in. Flip it around so it is oily. 
  6. Let the dough rise for about 40 minutes in a warm area. 
  7. Divide into 4 loaves and place on a parchment paper covered, corn meal sprinkled baking sheet.
  8. Let the little loaves rise for 35 minutes.
  9. Bake at 400F degrees for 20-25 minutes or until golden.