Showing posts with label Useful things. Show all posts

16 February 2018

Badge Holder Tutorial

I'm going to attempt to be as clear as I possibly can be with this tutorial, but the thought of writing it up came as a bit of an afterthought, so I don't have pictures of every step (specifically the beginning steps). I will be as verbally detailed as possible, but if anything is unclear, please let me know. The back pocket is totally optional, by the way. 

Materials:
  • 5" x 7" --piece of clear vinyl
  • 2 3/8" x 5.5" --binding for the top of the vinyl pocket
  • 5" x 8.5" --fabric for front/inside the vinyl pocket. About 1" will show above the vinyl pocket.
  • 5" x 8.5" --fabric for the back of the badge holder. About 2" will show above the back pocket, or a lot will show if you skip the optional back pocket. 
  • WOF x 2.5" --fabric for binding around the whole shebang, so match the front and back
  • WOF x 2.25" --strap fabric* You can make this a bit wider if you prefer. 
  • 2 pieces of 5" x 8.5" medium fusible interfacing. I used some that was super thin, so I used 4 pieces. 
*Optional Back pocket materials:
  • 2 pieces of fabric, 5" x 6" --fabric for back pocket. I pieced mine with scraps. 
  • 2 3/8" x 5.5" --binding for back pocket
  • 5" x 6" fusible interfacing
Step 1: Strap Construction
I have no photos of this step, but iron it in half lengthwise, then fold the long edges in to the middle and iron those creases. Topstitch down both long sides to keep it secure. Trim it down. Mine is about 36" long, but I'm a teensy bit short. I suggest draping it around your neck and figuring out where you want the badge to rest and trim an inch longer than that. Set it aside for now. 

Strap 2: Vinyl Pocket
Prep your vinyl pocket binding by pressing it in half lengthwise. Then you are going to machine it on. Center it on a 5" end of the vinyl and sew it down with a 3/8" seam. Fold it around and sew it down. Once it is sewn down, trim the edges to match the 5" width of the vinyl and set this aside for right now. I wish I could tell you some magic trick to make sewing vinyl easy. But it isn't. I've heard you can use special feet. I find it doesn't stick to the metal on my bobbin case as much as it does to the machine body itself, so I pull and tuck so it only touches the metal. 

Step 3: Main Body Construction
Begin by fusing one piece of interfacing to the wrong side of the front/inside of the vinyl pouch fabric. Fuse the other piece to the wrong side of the backing fabric. Put these two pieces WRONG sides together and baste around all four sides with about a 1/8" seam. 

Step 4: *Optional* Back Pocket Construction
Fuse your piece of 5" x 6" interfacing to the wrong side of the outer fabric for your pocket. Put this piece and the lining fabric WRONG sides together and baste around all four sides with a 1/8" seam. Prep your pocket binding fabric by pressing it in half, lengthwise. Sew it onto the top of the pocket. I have been told I machine my bindings backwards. I sew them in place on the back side (lining), then fold over and machine them down on the front (outside) [Side note, I do the opposite if I'm hand stitching down the binding], so feel free to start on whichever side you want. You could also go crazy and hand stitch the binding down, but I was in a hurry so eff that. 

Step 5: Assembly
Start off by basting the back pocket piece to the bottom of the main body backing around three sides. Then baste the vinyl pocket to the bottom front of the main body. Again, vinyl is tricky, so do your best to keep it from sticking as you go. Position your straps about 1/2" from the edge on the back top of the pouch with the raw ends aligned with the top of the fabric, and baste them in place. Here's a picture to show what I mean. 

Step 6: Binding!
Now you are going to machine down your binding, just as you would on a regular quilt. Prep it by pressing it in half, lengthwise and pressing one short end under by about a 1/2". I'm not going to explain how to miter binding corners, but if you need a tutorial, the internet is full of them, though I suggest this one, except I only left the beginning bit loose for a length of about 1.5". Machine it in place, fold it over, and then sew it down by machine or by hand. I did the initial placement stitching from the back, then sewed it down on the front, but do what makes most sense to you. When you get to the top, make sure the strap is not caught anywhere, but you will be catching the strap ends since they are already basted in place. That's it! For a final bit of security, I put another row of stitching at the very top edge to hold the strap in place since it was pointing down after binding but needs to be pointing up. 

Step 7: Enjoy!


22 April 2014

Quilt, Purse, Chickens

Last week I volunteered to donate a quilt for a silent auction. The proceeds from which will go to San Antonio Girls Inc. and their STEM (science, technology, engineering, mathematics) summer programs for girls, which is something I think is desperately needed. Woot! So I wanted to make something moderately sciencey. The only bad thing is that the quilt needs to be done by April 25th, because that is the only chance I have to drop it off. AHH!

I decided to do a gradient of blues to represent astronomical twilight--the time of day when the sun is far enough below the horizon so that stars are starting to be visible. The blues I decided on (in order) are: Michael Miller Cotton Couture in Royal, Bella Amelie Blue, Bella Bright Sky, Bella Little Boy Blue, and Kona Bahama Blue

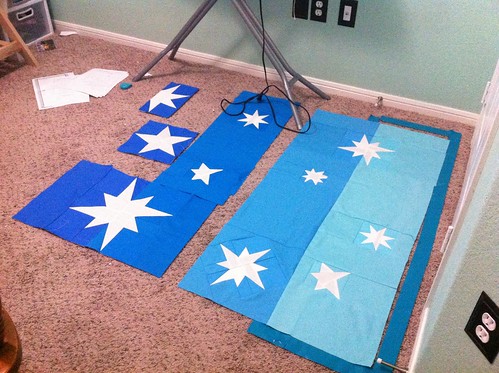
I wanted the stars to be different sizes and shapes, so I ordered fabric from Fat Quarter Shop on Monday and had it by Wednesday. Yay for living so close to them! By the time I left town for the weekend on Friday, I had this much done. Pretty impressive considering how much grading I had to do. But then not so impressive when you factor in that I didn't work on anything else and had one night of total insomnia where I just kept sewing all night because I wasn't sleepy.
Astronomical Twilight progress

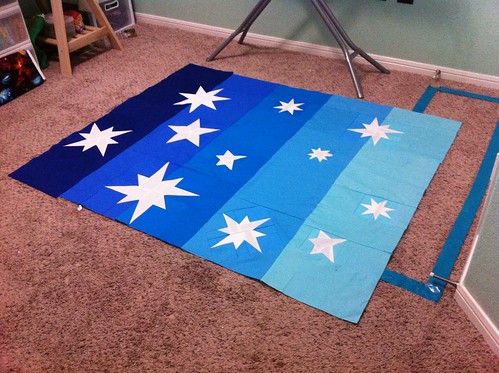
Yesterday was my odd day when I teach from 9-11:30 then not again until 7pm, so in that big gap of time, I finished up the front. Backing fabric was purchased today, so it will get basted tonight and hopefully quilted Wednesday.
Astronomical Twilight front is finished

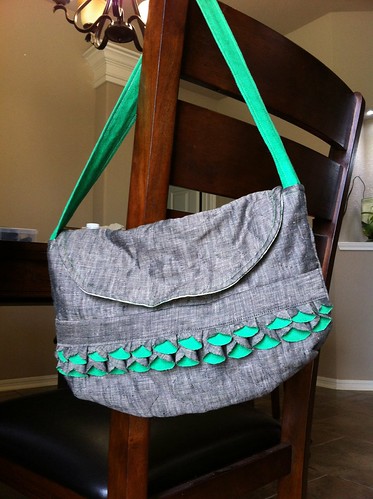
Since I had a big gap of time yesterday after the quilt front was finished, I decided to work on a purse. I am in need of a fancy purse since every other purse I have made is covered with crazy fabric. I combined the shape of this bag with the fabric cones from this bag. I am loving the way it turned out! The grey and green are both linen.
Purse

Close-up of the cones. It looks frumpy because I didn't have fusible fleece, so I had to settle for FMQ on some regular batting.
Purse detail

And I couldn't resist throwing in some Star Wars fabric since the colors matched so well. My inner nerd is very happy about this.
Star Wars purse lining

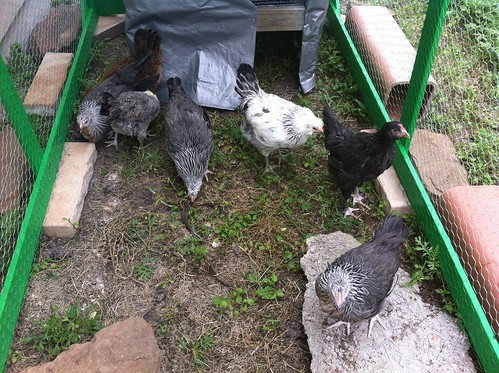
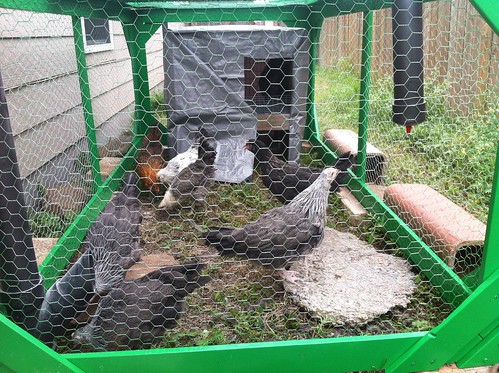
And continuing with the bright green, we have the now 10 week old chickens! They are huge! Also, they now live outside in a bright green enclosure.
Chickens are 10 weeks old!

Eight have already gone to their forever homes, so we are left with seven. Four of these are still needing to be re-homed, which will leave us with the three we want to keep.
10 weeks old and moved outside!

18 March 2014

Spring Break: Part Two

Here goes another attempt at a brief blog post. I finished and mailed my March contribution to the Mug Rug Revival swap. I went a little out of my comfort zone with the asymmetry, but I don't think it would look as fun any other way.
Untitled
Untitled
I drafted up the pattern to use for the block because I wanted to make sure all the corners were extra crisp. Here are links to the patterns I came up with in a few sizes, all free of course. 

Then it was laundry day and somehow the third load was forgotten. I could either sleep on a pillow without a pillowcase, wait until the dryer was done to sleep, or make a pillowcase. I decided to race my sewing machine against the dryer. I won by a landslide. Here is my squirrely new pillowcase.
Untitled

See? Squirrely!
Untitled

I also made another hot pad for my boyfriend's aunt in an effort to slowly replace her worn out ones. I used reverse applique for the circle and then regular applique for the rays.
Untitled

She loves mushrooms so I had to use this for the back! Side note: This might be my best stipple everrrrr!
Untitled

Oh! We decided to make a baked bloomin' onion (recipe over here) and it turned out delish.
Untitled

Then one day I decided it was a tote bag sort of day so I made this one for my friend Connie...
Untitled

And this one for my bff Nurget (Melissa)...
Untitled

And this one for myself. I couldn't decide which locally grown fabric I liked more, so I made it into a two-face sort of bag. Half the lining and exterior is one fabric, the other half is the other. Aren't the lambs and chickens adorable?!
Untitled

Speaking of chicks, here are my chickens on their 5 week birthday. We celebrated by giving them a big bowl of red cabbage. They mostly just carried pieces around in their mouths while frantically running away trying to hide it from everyone else who was obviously trying to steal that one piece instead of getting their own from the bowl.
Untitled

My boyfriend and I also made it up to the San Antonio Gem and Mineral Show. He picked up this gorgeous and huge piece of tiger iron. He got a great deal on it because it is just cut, and not actually polished (I put water on it to show the chatoyancy).  Side note, the locally grown tote bag was strong enough to carry this and all of our other purchases around the show!
Untitled

We both prefer rough rocks, so the smooth side will be the side facing down. How can you not love the rough side? I mean, this is what this rock looked like when it was dug up. Gorgeous, gorgeous, gorgeous! Anyways, we decided it should live on the coffee table, but didn't want it to scuff the table...
Untitled

...So I made it a teeny tiny quilt to lie on. I tried to model the FMQ after the striation in the rock itself. I toyed with actually making the lines the same color as the stripes in the rock, but the fabric was black to match the coffee table so I decided against that.
Untitled

Here is a better shot of the FMQ.
Untitled

And here is the lovely rock in its cozy new home. Taaadaaaa!
Untitled

27 February 2014

Plenty to do

This month for LYoF, I am going to divide my attention between two main goals. First off we have my Pantone challenge quilt. This is my fabric haul for it. The two left fabrics are solids and the second from the right is a shot cotton. I have never used shot cotton before and I am loving it! I have a design and everything is cut. Stay tuned for progress!
Untitled

My other main goal for the month is to finish up my bag for the Secret Tote Bag Swap. (Is it cheating is both of these HAVE to be done this month?) This is the main panel I have come up with. It is now trimmed and on its was towards becoming a bag.
Partner: If this giant panel turned into a tote, would you be able to love it? The lighting is a little off.

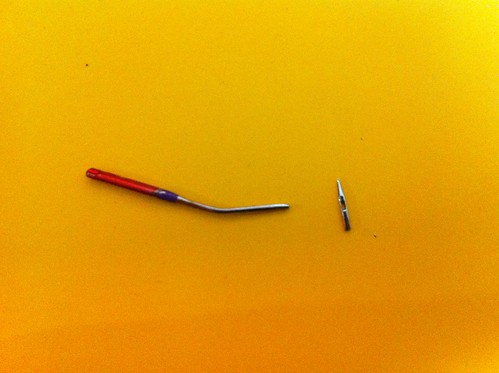
While I was working on the boxed corners for the tote last weekend I broke not one...
Uh oh.

But TWO needles! Dang. This second one was even a brand new denim needle! There are just so many layers in this bag. I might have been a tad overzealous in my plan. Oh well. With a third needle I was able to get the corners done!
Aaaand I broke another needle. This tote bag is going to be the death of me!

I also served as a pattern tester for TartanKiwi and came up with this lovely badger (pattern is now available for free over here). I named her Constance after the badger in the Redwall books. She is going to be the focal block in a tote bag for a friend of mine who is ironically named Constance. (She goes by Connie and would kill me if she knew I just called her by her birth name!)
Badger

In an exciting twist of fate, I actually won something! Something gorgeous! I won all this fabric from Cuts of Cotton! I have no idea what to do with it.
Untitled

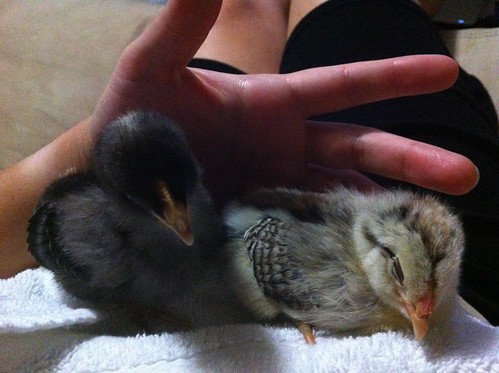
Then of course we have the chickens. They are thriving. Here they are at 11 days old, learning the joys of napping in laps.
At 11 days old they have learned the joy of napping in someone's lap. I'm hoping to master napping someday.

Two weeks old.
Two weeks old!

 Now 18 days old and huge!
18 days old

18 February 2014

Quilting and Chicks

I finished the quilting on the houndstooth "quilt" which means all I have to do is assemble the "quilt" into a cushion cover and it will be done in time! The easy way would be to staple the quilt to the bottom of a board and screw that into the chest. That is how the original cushion was attached. I want to actually make a pillow case for the foam. I'm thinking boxed corners. We'll see.
Untitled

I also finished up the baby quilt for my BFF's new baby girl. I was working on another front because this one seemed too babyish, but I went with it. This front was originally made as a sort of challenge.
Untitled

I used a stipple pattern for most of the quilt, since I'm still trying to master that technique. I couldn't resist throwing in a few FMQ hearts. I'm not sure how you are supposed to do this, but this seemed to work.
Untitled

I also finished the Valentines gift for my boyfriend. We went to Great American Beer Festival in 2012 where he got this shirt. Sadly it ended up with a greasy stain that wouldn't go away. He loved the shirt but didn't want to wear it stained. So I made him a reusable tote bag out of it. The other fabric is all leftover from the quilt I made him last year.
Untitled

Then we come to my most important WIP: Baby chicks! We received them from the hatchery at 3 days old. Cute little fluffballs! There are 15: I am keeping 2-3, my cousin is keeping 6-7, and we are selling the rest.
Three days old!

Here they are taking a nap at 4 days old.
Four days old--Everyone is napping!

At five days old, they were all starting to get big girl feathers.
Day 5- Starting to get big girl feathers!

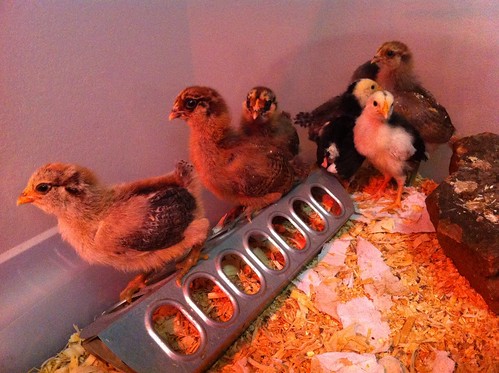
At day 6, we gave them pine shavings to dig in and a big rock to play on.
Day 6- Enriched habitat with pine shavings to dig in and a rock to conquer!

At one week old, they are all starting to master perching!
One week old--They can perch!

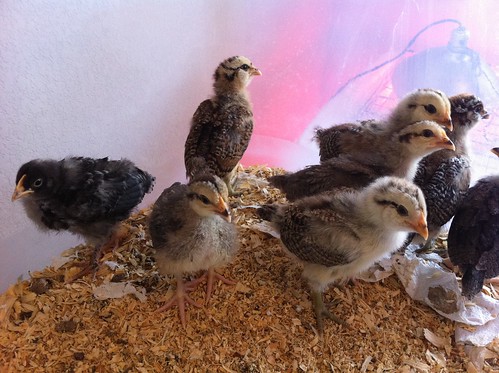
I goofed and only took GoPro footage on day 8, so you have to settle for a shot of them today, at 9 days old. They are getting huge and very fast [as you can tell by the chick that is no more than a blur!].
Untitled