Showing posts with label Postcrossing. Show all posts

20 January 2015

Syrniki Recipe

I love cooking! I love Postcrossing! I love having breakfast for dinner! I especially love when these two hobbies and one passion collide, as they recently did with the making of this delectable Postcrossing-inspired, breakfast for dinner extravaganza: Syrniki.
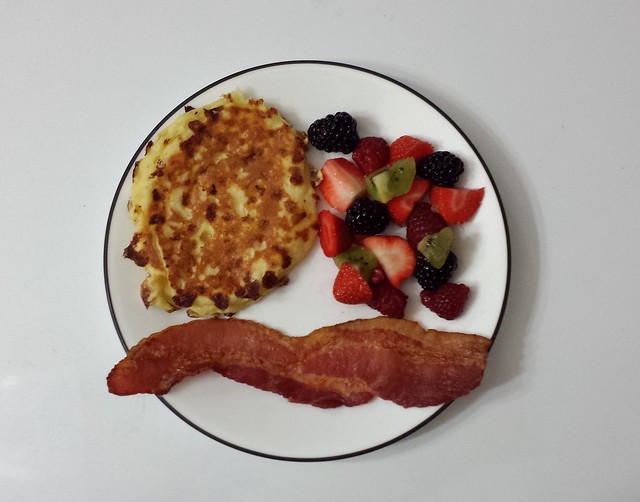
Syrniki

It all started when I received a gorgeous recipe postcard from Belarus. For those of you who might not be geographically inclined, let me begin by giving you a teensy bit of background information about The Republic of Belarus, which can be found here:

Belarus declared their independence from the Soviet Union in 1990, and now is home to roughly 9.5 million people. The capitol is Minsk (where more than 1/5 of the population lives). Perhaps one of my favorite Belarusian tidbits is that they have insanely gorgeous stamps! Every time I receive a Postcrossing postcard from Belarus, I am blown away by the stamps! Their wildlife collection is far-and-away my favorite.

Oh, yes, I was talking about a specific postcard before my propensity to go off on geographical and philatelic tangents took over. This postcard, to be exact:

Ain't she a beaut? 

The pictured syrniki, or Belarusian cheese pancakes looked delicious, so Anjo and I decided to try making them (after perusing the interwebs for other syrniki recipes to make sure the postcard recipe was comparable. I'm on to you, cake recipe card I purchased in France!). 

They turned out as delicious as we could have imagined. These are not going to feel like your typical breakfasty pancakes. They are much more dense, quite filling, and oh-so-tasty! Naturally I would expect this given that the average winter temperature in Minsk, (the capitol, in case you forgot) is 20.46 F degrees (or -6.41C). In that kind of weather, you need hearty food! ...Said the Texas gal who lives where it has not even dipped below freezing this winter. 

After making the recipe twice, Anjo and I have filled in the gaps that were in the postcard version. I hope you enjoy these as much as we did! Spoiler alert for your tastebuds: Anjo said these are officially his favorite pancake. 

Syrniki
  • 2 eggs
  • 500 grams of cottage cheese
  • 1 Tbsp. baking powder
  • 4-6 Tbsp. sugar
  • scant 1/2 tsp. salt
  • 1.5 cups flour
  • oil for cooking (I used vegetable, the card suggests sunflower)
1) Crack 2 eggs in a bowl.

2) Add 500 grams of cottage cheese and mix. It will stay lumpy. I tried to measure it out in cups, but a scale really worked best.

3) Add 1.5 cups of flour, a scant 1/2 teaspoon of salt (I just don't have a 1/3 tsp. scoop!) and 1 tablespoon of baking powder, and mix. I found varying info about how much a "packet" of baking powder contains, but this amount seemed to give the pancakes a wonderful texture, so I'm sticking with it.

4) Add 4-6 tablespoons of sugar and mix. The postcard called for 6-7 tablespoons, so we tried 6 the first time and it was too sweet for us. Four tablespoons made for a nice and savory pancake. Basically, add how much sugar your heart tells you to... Provided it is somewhere around the 4-6 range.

5) Heat a splash of oil in a pan. Add batter to the now heated, and oiled pan. A 1/3 cup measuring scoop works well at keeping the pancake sizes even.

6) Cook the pancakes covered for about 5 minutes, over medium low.

7) They should look about like this when they are ready to flip. 

8) Carefully flip them. Cook on the second side for about 3 minutes. If they are too brown or too pale after flipping, adjust either your heat or the length of time on each side. Not all stovetops work exactly the same.

9) Transfer to a paper towel lined plate/tray and dab some of the grease off. Or just eat them greasy. This is a judgment-free grease dabbing zone. Apologies for the gratuitous engagement ring shot! 

10) Enjoy! The postcard suggests topping the pancakes with sour cream, but syrup would also work if you are trying to convince these pancakes to be more like other pancakes. Personally I feel they are fine without any topping, but a nice serving of fruit and a slice of bacon definitely rounds out the plate. Eat them hot or put them in the fridge and microwave them later. If they get too soggy after microwaving, pop them in the toaster oven for a bit to crisp them up. 

25 June 2014

Eyeball Finish!

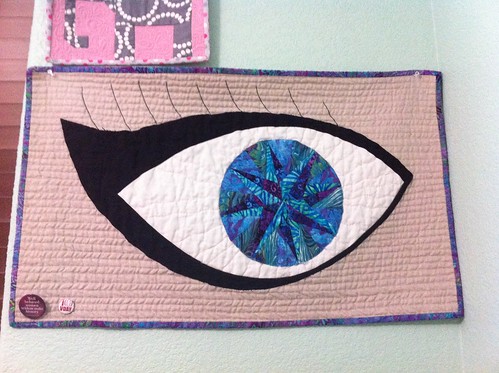
I am frantically trying to finish writing my new lab manual, so I really haven't had much time for sewing. Luckily I did finish my LYoF goal for the month, the eyeball quilt! Original link-up post is over here.
Untitled

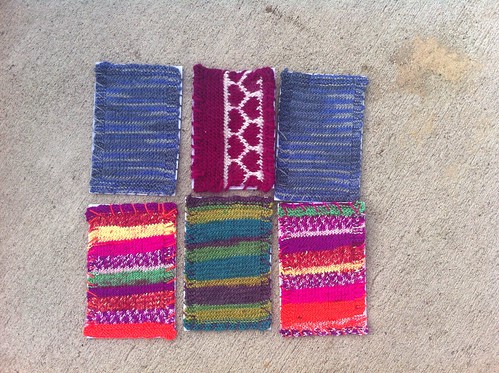
I have also been knitting some postcards for Postcrossing. I have already sent one to someone in Hong Kong, thanks to Postcrossing. I came up with a basic tutorial if you want to make some yourself.
Untitled

They DO make it through the mail, though you have to drop it off at the post office and pay a little extra because it can't go through the machines and needs to be sorted by hand ($0.70 for domestic, $1.35 for international). I sent one to my friend and she shared this photo with me after it arrived. Thanks, Toni!

Knitted Postcard Tutorial

I have been knitting some postcards for Postcrossing. I have already sent one to someone in Hong Kong, thanks to Postcrossing. Want to make some yourself? Here you go!
Untitled


For most of these I used size 1 yarn and US 3 needles, because that is what I had and it seemed to work well. If that is what you will be using, follow this. I have tips and tricks at the end.

Cast on about 29 stitches. There is a lot of wiggle room because you can stretch the rectangle later, or trim your card. I suggest anything between 27 and 31 stitches, but 29 seemed to work with most yarns I used.

Rows 1-5, Knit.
Row 6, Knit 4 for border, knit middle, knit 4 for border. (Borders are "garter" stitch)
Row 7, Knit 4 for border, purl middle, knit 4 for border.
Repeat Row 6 for even rows aka knit the even rows.
Repeat Row 7 for odd rows. (Odds and even combined is "stockinette" stitch)
After finishing an even row, Knit last 5 rows and bind off.
Then stitch the rectangle to a blank 4" x 6" card, like this. And that's it!

If you are like me and you forget to count, here is an easy guide to tell if you need to knit or purl.

If you are ready to start a row and it looks like this, you need to knit.

If you are about to start a row and it looks like this, you need to purl.

This picture shows the difference between garter (border) and stockinette (middle) stitches.

 They DO make it through the mail, though you have to drop it off at the post office and pay a little extra because it can't go through the machines and needs to be sorted by hand ($0.70 for domestic, $1.35 for international). I sent one to my friend and she shared this photo with me after it arrived. Thanks, Toni!


29 January 2013

Fabric Postcard + Tutorial

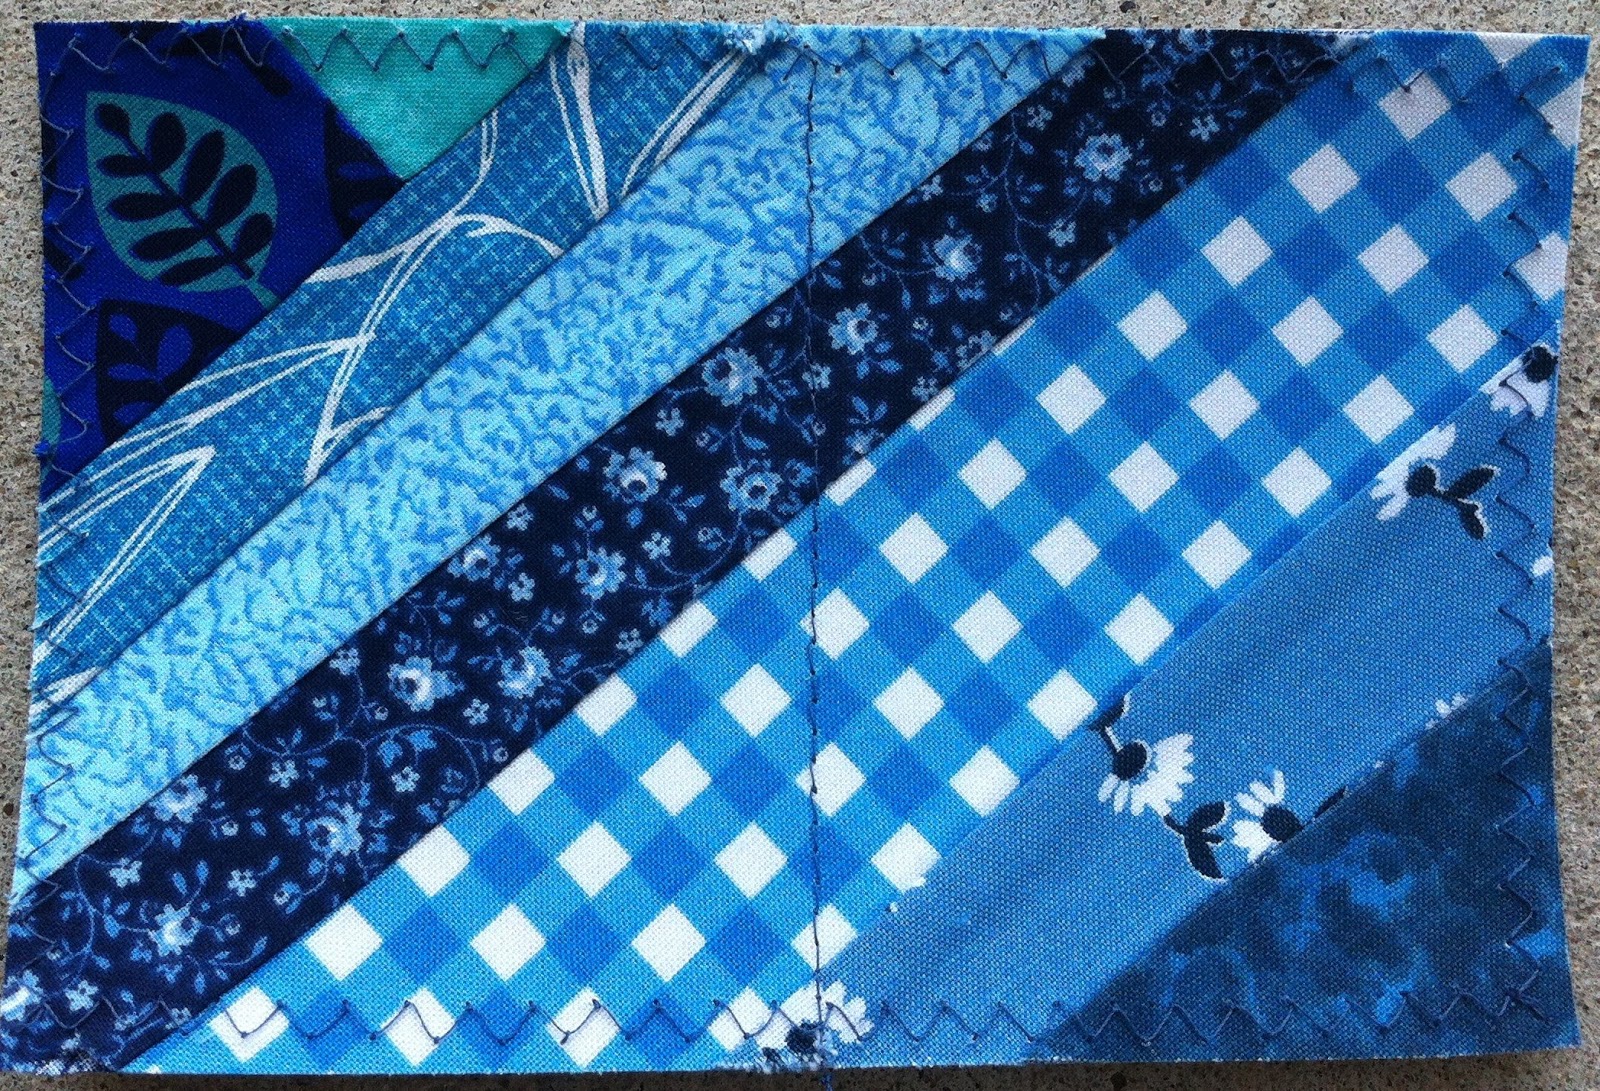
I love quilting. I love Postcrossing. Who says my two favorite hobbies can't collide in some bizarre multiverse? Not me. So with that, I decided to start making fabric postcards. Naturally, I will not be using these all of the time, but I made a few to try out for some of my best pen pals.

This one is for my cousin Zizi (real name = Suzy). Her favorite color is red, but she kept cracking up at the Berenstain Bears fabric, so I thought to branch out and make this. Plus, look at the expression on Mama Bear's face. It is so mysterious, almost like the Mona Lisa. Well, Suzy is an amazing artist and has done a few paintings inspired by the Mona Lisa, so I thought this was appropriate. Too bad the little lamb in the corner blends in and got stitched over.

This next one is for my cousin Kiki (Real name = Kimberly. She and Zizi are sisters). Her favorite color is pink. I wanted to try and use different values of pink so that it wouldn't be overwhelmingly pink. Plus, the lamb fabric is my faaaaavorite and I love using it. Luckily this lamb survived.

This next card is for my pen pal Kamilla from Norway. She was actually the first person I ever sent a postcard to through Postcrossing! Almost 300 postcards sent so far, and she is still the person I write to most. She is a die-hard Slytherin fan, so naturally the card had to be all green. 

This card is for my other pen pal, Andrzej from Poland. He just started at seminary, so I thought a cross inspired card would be appropriate. I love this wood grain fabric, and used the greens and blues to represent the grass and sky.

So the postcard that I am going to use as an instructional tool has an important purpose. One of my very close friends is moving away from Texas, and I am making her a quilt. But there is no way I am going to have it done before she moves, so I will be mailing it to her. Consider this postcard a teaser trailer for the actual quilt. I am using scraps that will eventually be in the quilt, so she can get an idea what to expect. I finished the postcard in time to even have it waiting for her at her new apartment in Tennessee.

Now for the tutorial! I am going to show you how to make an easy string pieced postcard. You can easily make a block in the regular way, and just jump in with the interfacing step and beyond.

The front of this postcard is made by using foundation paper piecing. You can use any type of paper for this, but I prefer to use phonebook paper because a) it is free b) it is easy to tear out later c) it is thin enough to see through, if you need to. Also, you might want to use an older rotary cutter blade for this project because it is going to get dulled cutting through paper.

I prefer to make a standard sized postcard, which runs about 4" x 6". To do this, you need to start by cutting a 4.5" x 6.5" rectangle out of whatever paper you are using as your template. 

If you are using a small sized phonebook, you can get two of these out of one sheet, fyi.

 See!

Once you have your template, you are going to string piece the fabric together. Start by laying down the center strip, and then place another scrap on top of it, right sides together, making sure that one edge lines up. Notice that my strips are way too long. They don't need to be this long, but they do need to be longer than the paper by about 1/2" because of the seam allowance. I sewed all of this with a 1/4" seam allowance. You are sewing through the fabric and the paper!

It is also very important to use a teeny tiny stitch length. This will help to perforate the paper and make it easier to tear it out when you are done.

So, once you have the first two strips sewn together, iron those bad boys and admire your work.

This is what it looks like from the back.

Then you are going to add the next strip, right sides facing, and sew it in place.

Aaaaand iron it too. You could finger press them between sewing, but since they are destined to be postcards, I want them to be as flat as possible to avoid getting shredded in some mail vortex.

Then you are going to continue sewing strips until the whole paper is covered by fabric. I am not going to torture you with all of these, because I'm hoping by now you get the gist of it.

Once all of the strips are sewn on, this is what the sheet will look like from the back.

At this point you need to trim off the excess fabric.

 Work your way around the rectangle, trimming as you go.

Then presto! You have a perfectly pieced scrappy rectangle.

 At this point you are ready to remove the paper. Thanks to our tiny stitch sizes, the paper just pulls right off. It feels like MAGIC! Obviously you should take all of the paper out. I only left some to show how well it comes off.

Now we need to make the fabric into a postcard. Layer one: Fusible interfacing. You can use any weight you want, but since I use cardstock as the backing later, I stick to Featherweight or ShirTailor weight. You are going to cut a 4.25" x 6.25" rectangle (smaller to account for mess ups). 

Then iron this on to the back side of your fabric, trying your best to keep it centered. The bumpy/scratchy side of the interfacing should be the side facing the back of the fabric. A pressing cloth might be helpful at this point, but I showed it without, so you can get the idea.

So the best thing about the interfacing (okay, maybe not THE best, but good!) is that it holds your seam allowances in place. Woohoo!

Then you are going to use a 4.25" x 6.25" piece of fusible web (I like Wonder-Under). This stuff has glue on both sides, but one is protected by paper backing. Iron the non-paper backed side to your fusible interfacing side.

Then you need to cut a piece of cardstock that is 4.25" x 6.25" (or 4" x 6" if you are bad at centering when you iron) and affix it to the back of the card. To do this, you need to peel off the paper backing from the fusible web, then iron. I didn't take a picture of this step, because you probably already know how an iron works.

At that point, it is a postcard, but it isn't quilted! Depending on the design, I sometimes stitch down the middle (increase your stitch length back from microscopic) and then zig zag around the edges. You can use any fancy stitches you want to, but my machine is fairly no-nonsense. If you have a serger or a machine where you can change the stitch width, you can make it look nice and finished on the edge. 

Then you are done!! All you have to do at this point is write a message, copy an address, and stick a stamp. Woohoo!

I hope this was easy to understand. If there are any questions, please don't hesitate to ask.