14 October 2013

Bacon Jam Empanadas

Almost a year ago a friend of mine posted something about making bacon jam. My ears always perk up when I hear the word "jam" because I love canning and finding someone remotely close to my age who makes jam is rare. But she said BACON jam. What the heck? I frantically started googling. I found this book along with a review mentioning a forward by Paula Deen and immediately ordered a copy.


The narrative they include at the beginning of the cookbook is definitely worth a read (hello, crying because of a cook book), but the most outstanding thing I have found has to be the bacon jam. Because I am utterly incapable of following recipes, I modified it. So here it is, with my modifications. The ridiculously photo heavy version is followed by the text-only version.

Enjoy!


To begin with, you are going to chop up one pound of bacon. I learned that it is easier to chop if your knife is super sharp and the bacon is right out of the fridge. I chopped the fatty bits into smaller pieces (1/2") and the meaty bits into 1" pieces. Mmm, bacon.


Now we need to add the bacon to a pan.


Then you barely cook the bacon in a pan. At this point, you do not want crispy bacon. If you enjoy your bacon more well-done (I'm right there with you, so trust me), it will be well done later. It should look like ham, with the edges just barely turning brown.


Scoop it into a metal colander with a bowl under it to drain. Leave about 1 tablespoon of fat in the pan, or add it back in. This is going to add all that incredible bacony goodness to your onions (sorry to my vegetarian and vegan friends who probably aren't reading this anyways).

OH YEAH! Onions! While your bacon was cooking, you could have saved time and diced your onions. Or you can do it now. Whatevs.


But once your onions are chopped, you will add them into the greasy pan.

Now you are going to follow a bunch of tedious steps that could have been done before you started everything, while your bacon was cooking, or now, while your onions are cooking.


Grab some garlic.


Peel a few cloves in whatever way seems easy to you. I like bashing them with the side of an ulu.


Then dice those bad boys up! 


Pick some rosemary.
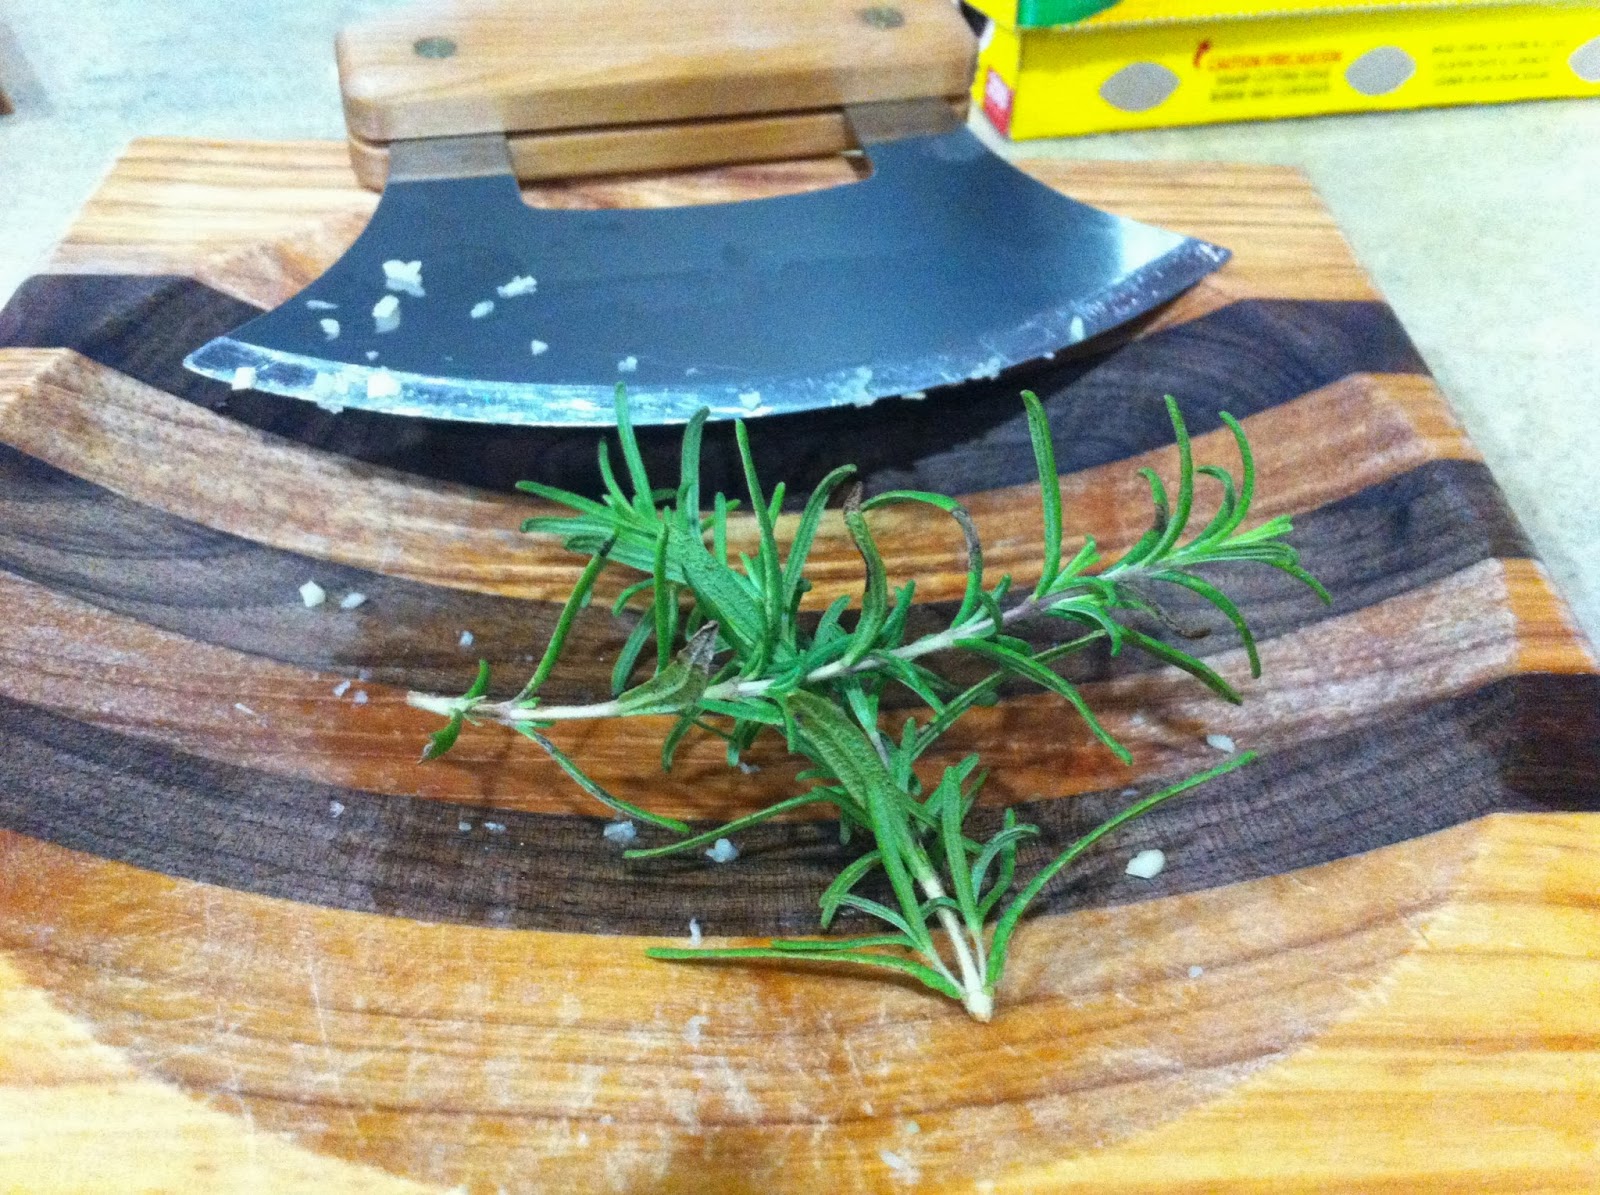

And chop that up too.


Measure out some red pepper flakes. I had already put my garlic and rosemary in one vessel at this point. They all go in at the same time, so it totally works.


And some cayenne pepper. Not too much though, if you aren't fond of spicy stuff.


Then you need some brown sugar. 


But don't you dare mix any of that with the onions... Yet. 


Hokay, so, here is the Earth. Ack! I mean, back to the onions. You want them to get nice and gorgeous brown. Once they look good enough to eat on their own and your whole kitchen smells like heaven, add the garlic, rosemary, cayenne, and red pepper flakes.


Oh snap! don't forget the brown sugar!


Mmm, the rosemary is so fragrant at this point. But I like bubbles! So we need to add some liquids. Let's start with coffee. Now, my boyfriend and I don't really drink coffee so we had to buy instant coffee.


All around the world, coffee snobs are weeping. I'm sorry. Anyways, add some strong coffee of any kind! Woaa, hello blurry pictures!


I struggle to make anything without balsamic vinegar (I have put in in cupcakes, frosting, ice cream, you name it!), so let's add some of that!


How about some maple syrup since maple and bacon compliment each other so nicely!


Then comes the wonderful stout beer. You can use any type of stout you can find. While my boyfriend and I don't drink coffee, we do drink a lot of beer. This was my on hand selection for stouts.


Any stout will work. You can probably find some at your local grocery store. Just add some in.


A very important step is to start drinking some of the leftover stout. Unless you don't like stout, in which case you can send it my way.


Then we have to add the most important ingredient in bacon jam: THE BACON! Now that it is drained, just add it all back in. Weeeee!


Mix it all up and get it heated to a nice low simmer.


You are going to simmer it for up to an hour but probably not less than 45 minutes. If it starts getting a little dry, you can add some water or more beer (that is, if you didn't drink all the beer already).


Here is a picture of what it looks like around the halfway point. I kept saying "just keep stirring, just keep stirring..."


After 45 minutes to an hour of simmering, mixing, watching, sniffing, drooling, and drinking you end you end up with this glorious thing:


Then for good measure, add in a splash of bourbon and let the jam absorb that up!


Now we are ready to assemble the empanadas. I made the dough the night before. The directions are fairly easy; Mix all dry ingredients.


Then add the butter and just enough water to make it kinda doughy but not too sticky. Knead. Refrigerate. I forgot to take pictures of those steps. It was late. Please forgive me.


When you are ready to roll out the dough, you can use a floured surface, or roll it out between sheets of wax paper. Either way, roll it out, then use something circular with a diameter between 4"-5" to cut out circles. I used 4.5" diameter Pyrex bowls.


Fill each circle with equal parts bacon jam and shredded extra sharp cheddar. Ooookay, you don't have to use extra sharp cheddar, but I think it adds a nice bite. That's what I look for in food... Bite.


Then fold your circles in half and crimp the edges. I sprinkled some cheese on top because it looked pretty and I suck at estimating how much cheese to shred which results in way too much leftover shredded cheese. 


Then bake them on a parchment paper lined baking sheet (because who really wants to wash dishes?) until they look golden brown and drop dead gorgeous! Taaadaaa! Bacon Jam Empanadas! 


Unless you do a double or possibly even triple recipe of crust, you are going to have some extra jam. No worries. I have been using it in sandwiches, on salads, in quesadillas, on toast, with eggs, and just about anything. The possibilities are seemingly endless!  


Bacon-Jam Empanadas

For the Bacon Jam
1 pound bacon
1 medium sweet yellow onion, diced
3 garlic cloves, minced
1 teaspoon dried rosemary, chopped
1 teaspoon red pepper flakes
1/8 teaspoon cayenne pepper (or less if you do not like spicy)
1/4 cup packed dark brown sugar
1/4 cup freshly brewed strong coffee
2 tablespoons stout beer
1/4 cup balsamic vinegar
1/4 cup maple syrup
2 tablespoons Kentucky bourbon

For the Empanadas

1 recipe Cornmeal Crust (below), unbaked
1 cup shredded white extra sharp cheddar cheese

To make the bacon jam:  Roughly chop the bacon into 1/2 to 1-inch pieces.  Render the bacon in a large skillet over medium heat until the edges start to turn brown but the bacon is still soft.  Drain the rendered bacon fat by setting a fine-mesh sieve over a bowl and spooning the bacon and rendered fat into the sieve.  Let the bacon sit in the sieve while you caramelize the onions.


Add the sliced onions to the skillet, then add 1 tablespoon of the rendered bacon fat and cook over medium heat, stirring frequently, until the onions are translucent and starting to brown, 10 to 12 minutes.


Add the garlic, rosemary, red pepper flakes, brown sugar, coffee, beer, balsamic vinegar, and maple syrup, stir, and bring to a light boil.  Add the drained bacon and bring back to a light boil, then turn the heat down to medium-low.  You want to keep a low, steady simmer to reduce the liquid and thicken it without burning the jam.  The process of reduction can take as long as 1 hour.  If the jam becomes too dry, add 1 to 2 tablespoons water.


Remove the bacon jam from the heat, add the bourbon, and let cool for 20 minutes. Once it has cooled, you can put the jam in an airtight container and store it for up to 1 week in the refrigerator.


To make the empanadas:  Position a rack in the middle of the oven and preheat the oven to 350 degrees F.  Line a baking sheet with parchment paper.  Remove the cornmeal crust from the refrigerator and let it sit on the counter for 15 minutes.


Lightly flour a smooth work surface.  Use a rolling pin to roll the dough out 1/8 inch thick. Using a 4.5 -inch biscuit cutter or tart mold, cut the dough into circles.


Place 1 tablespoon bacon jam and about 1 tablespoon shredded cheddar cheese in the center of each round.  (You will have extra bacon jam.) Fold each dough round in half over the filling, making sure you don't tear the dough or push the filling to the edges, and using your fingers, press the edges together and then crimp them with the tines of a fork to seal them.


Place the empanadas on the prepared baking sheet and bake for 18-22 minutes, or until golden brown. Serve the empanadas warm.  


Cornmeal Crust

1 1/3 cups unbleached all-purpose flour 
1/3 cup yellow cornmeal
3 tablespoons sugar
1/4 teaspoon fine sea salt
8 tablespoons (1 stick) cold unsalted butter, cubed
1/4 cup ice water, plus more if necessary

In a medium bowl, whisk together the flour, cornmeal, sugar, and salt.  Using a pastry cutter, cut in the butter until the mixture resembles coarse oatmeal.  Add 1/4 cup ice water, one tablespoon at a time while stirring lightly with a fork until the flour is moistened, then gently knead the dough 4 to 6 times in the bowl, until it comes together.  You may have to add up to an additional 2 tablespoons water if the dough seems dry or less if it seems moist.


Shape the dough into a ball and flatten it into a thick disk.  Wrap it in plastic and refrigerate for at least 1 hour or up to 1 day.  

10 October 2013

Scrumptious Jumping Jacks: Part One

I caught up on grading and decided to take on a sample quilt for my LQS. My interest in this sample was high because it was using Scrumptious by Bonnie & Camille and the colors in this line made me so happy!

Taking on this project was a big decision because the owner usually lets me take up to a few weeks to finish a front if I need it, but this particular quilt was to be done on a deadline. It had to be DONE as in the front finished, back to her husband for quilting which could take a few days, back to me for binding and back to hang in the store within 10 days. This could have gone so wrong since I am teaching 7 classes at the university this semester. But I looked at the pattern before accepting and decided it would go together quickly.

Ooo! I had no idea just how easy it would be! Let's just say, the front is already done and I have only had the fabric for 27 hours. Yay for quilts that use precuts! The book the pattern is from (Quilt from Sweet Jane by Sue Pfau) is full of precut quilts that all look simple but adorable! This quilt followed the Jumping Jacks pattern and had options for either charm squares or layer cake squares. Starting with two charm packs (less cutting if you start with the 5" squares) my total time spent on the front of this quilt including cutting the background fabric came to just under four hours! Woot!

So here is the front of the quilt that is off to the quilters early! Stay tuned for photos after the quilting and binding. :)
Scrumptious jumping jacks

08 October 2013

Teeny Tiny Things

I decided on a plan for the next Mug Rug Revival Swap. My partner wants something holiday themed, which is awesome because I do not like holiday fabric for myself because I do not decorate, but I have had a few patterns floating around in my brain. So far I have strips with a bunch of little 1.5" squares and it doesn't really look like much, but it will!
I know it doesn't look like much right now, but it will!

I also finished 19.5/20 of the 3" half hexie pinwheels I am making (I say half because one is done, just backwards and one is done now but wasn't done in the picture) for the EPP 30s repro quilt. I had not conceptualized how big the quilt would come out with just 20 blocks. The answer is too dang small.
Untitled

It was smaller than a baby quilt, which is no good since I want this to be for me! So I decided to make a whole lot more half hexies before sewing pinwheels together so that it would still be random if my color ratios were off. Originally I had 4 each of red, yellow, blue, purple, & aqua/green. I collected a few (15) more fat quarters during the Quilt Across Texas shop hop in September. Between that, what I had in my stash (Uhhhm, how do I have that much 30s repro if I never use any?!), and adding in a four not 30s repro prints that match the color scheme, I now have 7 more fabrics in each of the 5 color ways. I have already cut these into strips and am toting them along everywhere with me. Maybe someday this quilt will be done.
Untitled

I also managed to finish the trivet I am making my boyfriend. It is a teeny tiny version[ish] of the quilt I made him ages ago. Here is the quilt, for reference.
Finished quilt for my boyfriend (72" x 72")

Here is the finished trivet. The quilting on the trivet is the antithesis of what I did in the quilt. The quilt had tidy diagonal lines spaced 2" apart while the trivet, well, not so much. I started with diagonal lines, but it just didn't look right with the light linen background so I went with a stipple.
FMQ trivet


Here is a close up of some of the quilting. I know my FMQ still has a lot of improving to do, but I am slowly getting there. Since it is for my boyfriend, I tried to add a little heart. It doesn't look too heart-like, but that just means it will be more camouflaged.
FMQ sneak peak! <3

The trivet has two layers of Insul-Bright, and the backing is grippy shelf liner so it will not slide around. I had sewn shelf liner before and it wasn't too difficult. This particular brand of shelf liner is insanely grippy, I suppose, because it was impossible to sew with my machine. What I did to overcome the obstacle was machine stitching the binding to the front through the front and two layers of batting. Then I turned the binding and stitched it to the back, but caught the shelf liner in these stitches to hold it in place. Viola; Grippy and heat resistant!
Trivet backed in grippy shelf liner stuff!

I also had some time to try a new recipe this weekend. It is for bacon jam empanadas with a really delicious cornmeal crust. They are basically the best thing ever. I'm hoping to write a tutorial for this soon. :)
Bacon jam empanadas with cornmeal crust!

01 October 2013

Piecing, Love, and Fox Bag!

This week I converted a nearly forgotten UFO into a WIP! This L-O-V-E was the first thing I ever made with paper piecing. I used all of my most favorite fabrics at the time. My initial plan was to have this be the center of a quilt and surround it by blocks in coordinating colors. After countless bees trying to get blocks that matched, I ended up with about 40 blocks in similar colors, but only a handful actually matched. Bummer. Then there is the size: Each letter is 8.5" x 10.5" (8"x10" finished), so even sized up with double border, it really wouldn't work well with standard 12.5" blocks. So with all that, I put this away over a year ago and forgot about it completely...
Love with double borders

...Until today! I really wanted to try out making some prairie points because I am thinking about using some for my next mug rug swap project. I don't like the old school kind for the border and prefer the interior borders. So I went hunting for something small to use prairie points on. Then I started thinking about the genius advice my boyfriend gave me.

I was getting discouraged about still not having the ruler to make the Houndstooth cover for my cedar chest upholstery project when he suggested that I make multiple covers as pillow cases and use utility foam to hold them to the chest instead of stapling to a board and screwing to the chest.

I decided to kill two birds with one stone! That's a bingo! Obviously I was never going to finish the LOVE quilt, so I ripped out a bunch of stitches and reworked it. Then I framed LOVE in grey linen prairie points.
Untitled

Now I just need to figure out how to quilt the thing, and how to make this into a cover for the giant piece of foam. In the process, I learned a few things about prairie points.

  1. Do not use linen without starch for your first try at prairie points.
  2. Make sure the open sides of your triangles open towards the direction you will be sewing so you can avoid having to straighten every single triangle.

Untitled

There was also other progress made! I finished the purse for Secret Tote Bag Swap. Now I am in the process of filling it with goodies so I can ship it out. I can't say any more about my partner since they do not have the bag yet. I keep having the urge to make fox stuff because of the "What Does the Fox Say?" video.
Partner, if you like this I will switch my focus towards goodies to put inside it. If you don't like it, I can figure something else out. :)

This past weekend was spent at the new house and I had a little bit of free time. In that free time, I was able to finish a whole lot more EPP half hexagon pinwheels. Oh! I decided to make the pinwheels turn this way. I haven't ripped the stitches out of the one going the other direction. Maybe I will still make a whole separate quilt to avoid ripping stitches.
Untitled

My boyfriend and I even got a little more painting done in the future sewing room. We finally did the ceiling! Right now, the entire house is that tan/brown color on all walls and ceilings. It is fine in its own right, but a little boring. It is insane how much bigger the room feels with white ceilings. Hopefully this weekend we can finish painting the sewing room.
Untitled

24 September 2013

Hand Sewingpalooza!


Maybe it is my busy work schedule, maybe it is the [seemingly] never-ending move, maybe it is just me being lazy because it has been cloudy and rainy for a few weeks (and it is never cloudy and rainy in South Texas. We are in a horrible drought!) but I just haven't been able to find the motivation to fit in sewing as of late. That being said, I have been on a mission to do sewing.

You see, I really want to work on a houndstooth cover for my vintage cedar chest reuppholstery project, but I can't find the stinking ruler I need. Here's the thing, no one in town has it so I ordered it from Amazon. It arrived a week late and broken into two pieces, so I returned it and got a full refund which left me with still no ruler. I have been to over 10 shops in the surrounding area (September is Texas shop-hop month aka Quilt Across Texas) and no one has it! Uggh. So here is my plea: Have you seen this ruler?? If so, please tell me where!


Okay! On with the sewing. First up I have a picture of all the beautiful 3" half hexies I finished basting. Well, not all. I finished 120, but had already sewn 14 together at this point. Have no fear; I will show you what I have sewn together! I have no idea how big this quilt is going to end up, but I have known from the beginning that I do not want fabrics to repeat. Luckily this gave me something to buy during the shop-hop since I couldn't buy the ruler I really wanted. Here are all my hexies!

When I travel with my hexies, I am always scared their edges are going to get bent. If I put them in a zippered pouch, they can get bent up with the bag, if I put them in a rigid pencil box, they have too much room and can slide around. I was starting to think they wouldn't be able to travel with me, and really, what is the point of an EPP project if it can't travel? Then I found an empty mask box lying around! I'm a scuba dive leader, so I have way too much scuba gear, but in this case it totally paid off! Look at how well they all fit in here!
Untitled

So perfect for 3" half hexagons!
 Untitled

I had sewn one pinwheel together last week and left it at home. Then I went out of town and had some time to sew, but I had forgotten completely which direction I had the first pinwheel going. I had a 50/50 shot of getting it right and of course I got it wrong. So now I don't know which direction to sew the rest in. Ripping it apart is going to be hard. Maybe I will just make a second quilt with the pinwheels going the opposite direction. That seems like less work, right? Making an entirely separate quilt to avoid ripping out a few stitches. FYI: I said I had 14 stitched together and each pinwheel only has 6. The final two are in the upper right corner of this picture.
Untitled

I also started working on the applique I'm doing for the Secret Tote Bag Swap. I'm getting so excited about it! Hopefully I will be able to suck it up and get some machine sewing done this week. :)
Progress!