I saw a quick video from the show Fons & Porter Love of Quilting in which they made woven fabric for a wall hanging. It looked beautiful! I knew I had to try it, so the hunt for a tutorial began. But as usual, nothing could be found. So I made one. You can make this into any size of a panel you want.

The finished size of these panels is 7.5" x 10". They will eventually be the backs of zippered pouches, but you really could make it any size and use this for anything!
Let's begin. First you need to cut a lightweight interfacing to help your woven fabric not go all willy-nilly later. Cut this to whatever size suits your project. Most interfacing is 20" wide, so I cut one strip that was 7.5" wide.

Then I cut that strip in half.

This results in two identical pieces with a dimension of 7.5" x 10". Set these aside for now.

Next we are going to built a strip set. Pick two fabrics. You will cut half as many strips of the primary fabric. I am using this batik for the primary fabric.
Cut 1.25" strips. To cover one 7.5" x 10" panel, I needed 3 strips of this fabric.

From the secondary fabric, I cut 6 strips that also measured 1.25".

Then you are going to sew your strip sets together using a 1/4" seam. If you sew a little bigger or smaller than 1/4", that is okay here, as long as you are consistent.

I like to strip piece these because it saves thread and feels like it goes faster. You will be sewing a strip of secondary fabric on both sides of the primary fabric.

Once all the strip sets are sewn together, you need to set the seams. You do this by pressing with a hot iron while the fold is still closed. Do this on both sides. It helps to keep everything straight and prevents puckering!

Once all the seams are set, you are going to press the seams away from the middle. I like to press from the front as much as possible, which again avoids puckering.

This is what it should look like from the back. If you had already set the seams, you could totally press the seams to the side from the back.

Next we need to make the edges pretty since they will be woven, not sewn together. On the back, you will fold the outer layer in to the stitch line.

I hold them in a few inches ahead of the iron and press both sides at once.

Then you just iron away until all of your strip sets are done!

Go ahead and bring back the pieces of interfacing. Then go ahead and trim the strips to the correct length. You are going to cover the interfacing in one direction first. The bumpy side of the interfacing should be up and facing towards the fabric.
**Note** It helps to do the weaving either on your ironing board or on a piece of fabric so that you don't have to risk dropping it and messing up all your hard weaving work.

Then you are going to start weaving the strips in the other direction. Remember, you are shooting for an under, over, under, over pattern. I fold back every other strip.

Make sure you push the strips together so there are no gaps. Also make sure the whole piece of interfacing is covered.

Once the weave is to your liking, you will carefully carry it to the ironing board and press the weave to the lightweight fusible interfacing.

From the front, it might be difficult to get the interfacing completely fused, so I had luck with carefully flipping it over and ironing from the back. Whatever you do, just make sure you fuse at least a teeny bit of each piece so they don't slip out.

At this point, you are basically done. Because I am paranoid, before trimming the edges, I stitched 1/4" from the edge of the interfacing all around. This just makes sure no part of the weave is going to slide out.

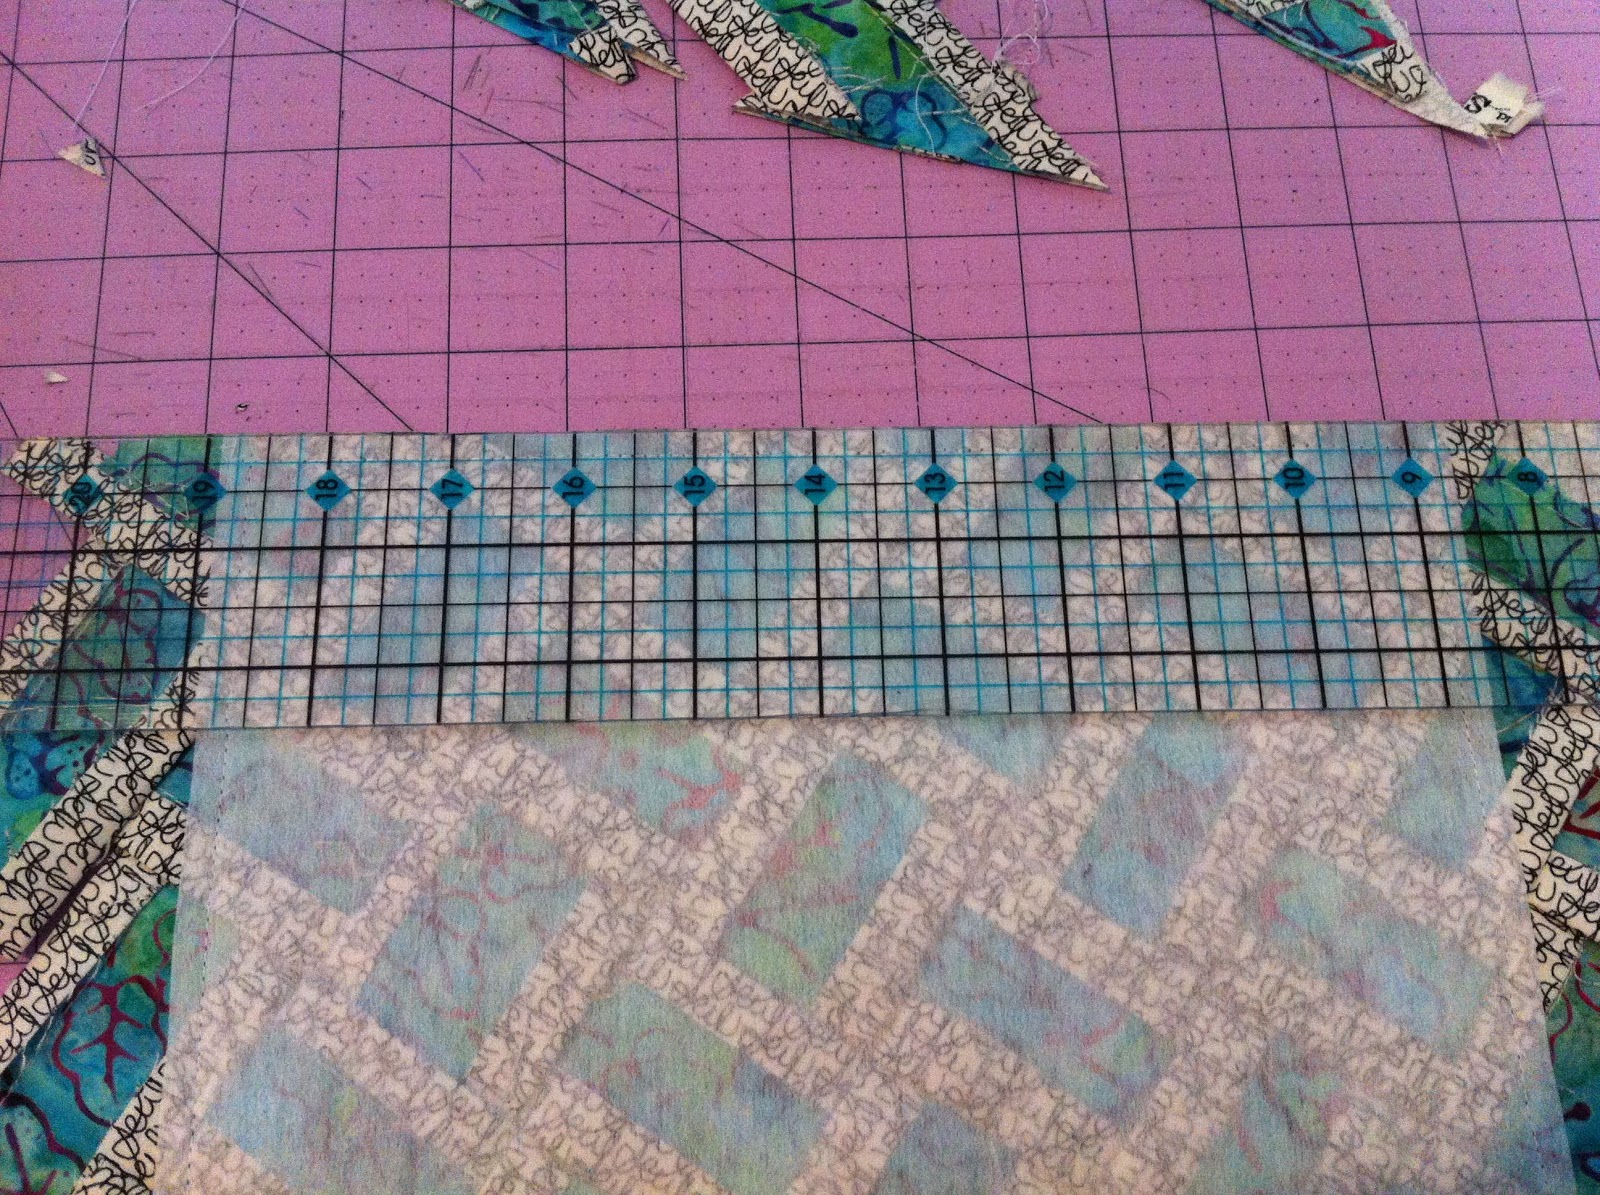
Then all you have left is to trim off the excess fabric. I just used my rotary cutter and ruler to cut around the interfacing.
And that's it!
Now you have a super fun piece of woven fabric that you can hide trinkets in.

Mmm, and the texture! I love it!

You could definitely quilt the panel, or leave it as is. The possibilities are seemingly endless! Apparently I am really into the juxtaposition of a colorful print with texty fabric.


Thanks for reading my tutorial! Let me know if something is unclear. Sometimes I type so fast that my brain can't keep up. I would love to see what you come up with using this technique!
very cool. I love to weave some fabric! Have done it a few time (boring squares, nothing cool like this). I'm sure I'll try it sometime, after I get through the other 10 projects waiting on me! :)
ReplyDeleteLoved reading this. I found the tutorial very clear and it makes it look fun and easy. I like that you put the weaving on the bias, as it adds another dimension to the whole concept. Lovely!
ReplyDeleteElizabeth E.
opquilt.com
Very cool woven fabric!
ReplyDeleteThis is so neat!!! Great tutorial too...now I have to follow you so I can remember where to come back for it later...lol Thank you!!!
ReplyDeleteSorry...I can't find where to follow you...help?????
ReplyDeleteWow, that's amazing! You did a lovely job.
ReplyDeleteSo cool! And a fantastic tutorial, thanks for sharing.
ReplyDeleteSo clever and cute. Love the fabric you used for the tute also.
ReplyDelete